Database Development in Visual Studio
A lot of database administrators and developers like to use the SQL Server Management Studio to make changes to the database schema directly. As a production DBA, I can definitely say that there are situations where this is acceptable and even desired, however, usually a Visual Studio Database Project is a better approach. I have made a switch from developing in SSMS to Database Development in Visual Studio several years ago and never looked back.
If you know how to get started in Visual Studio and how to import the database you can jump straight to the benefits of using Visual Studio for database development
How to start
There are several ways to start database development in Visual Studio. Firstly, you will need Visual Studio. Visual Studio was a premium and quite expensive product, however, a few years ago Microsoft released the Community edition which is free! You can download a copy from here: https://visualstudio.microsoft.com/vs/community/
Create a new schema
The obvious and easy way is to simply create a new database project and start developing the database from the grounds.
Import existing schema
Likely, however, you will have existing databases that you would like to import into a database project. Firstly, create a new database project and then import existing schema which you can do in several ways:
Direct connection to Database
This option allows importing schema by connecting to the SQL Server database directly. It is the easiest option but please keep in mind that it may not work in some environments if there are network restrictions or if you do not have access to the server.
Import DACPAC (Data-tier Application)
To address the potential restrictions described above, we can ask our friendly production DBA to extract a DACPAC from the production database. DACPACs are files that contain the entire database schema without any data. You can read more about Data-Tier Application on MSDN: https://docs.microsoft.com/en-us/sql/relational-databases/data-tier-applications/
In SQL Server Management Studio this can be done by the right-clicking database -> Tasks -> Extract Data-Tier Application
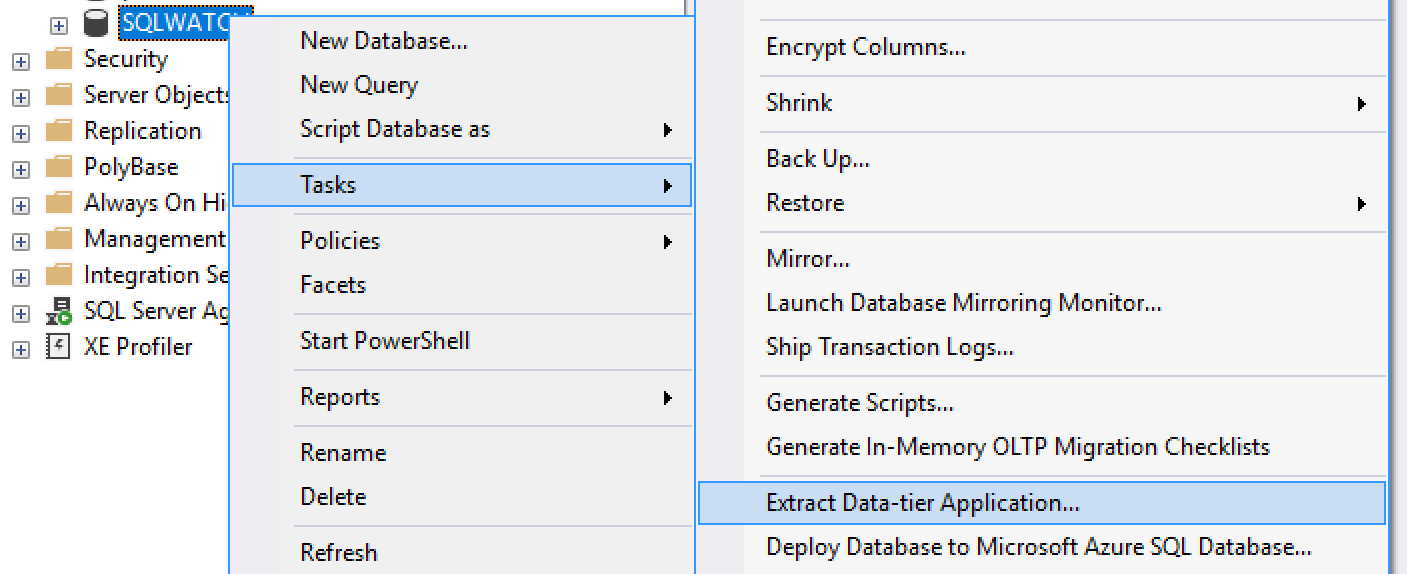
This will create a *.dacpac file in a chosen location which can be imported in the Visual Studio.
You can read more about extracting DACPAC on MSDN: https://docs.microsoft.com/en-us/sql/relational-databases/data-tier-applications/extract-a-dac-from-a-database
It is also possible to extract DACPAC via command line using SqlPackage.exe. SqlPackage.exe is a little command line application responsible for extraction and deployments of DACPACs. It is part of SQL Server installation and not Visual Studio. More on this later.
Import SQL Script
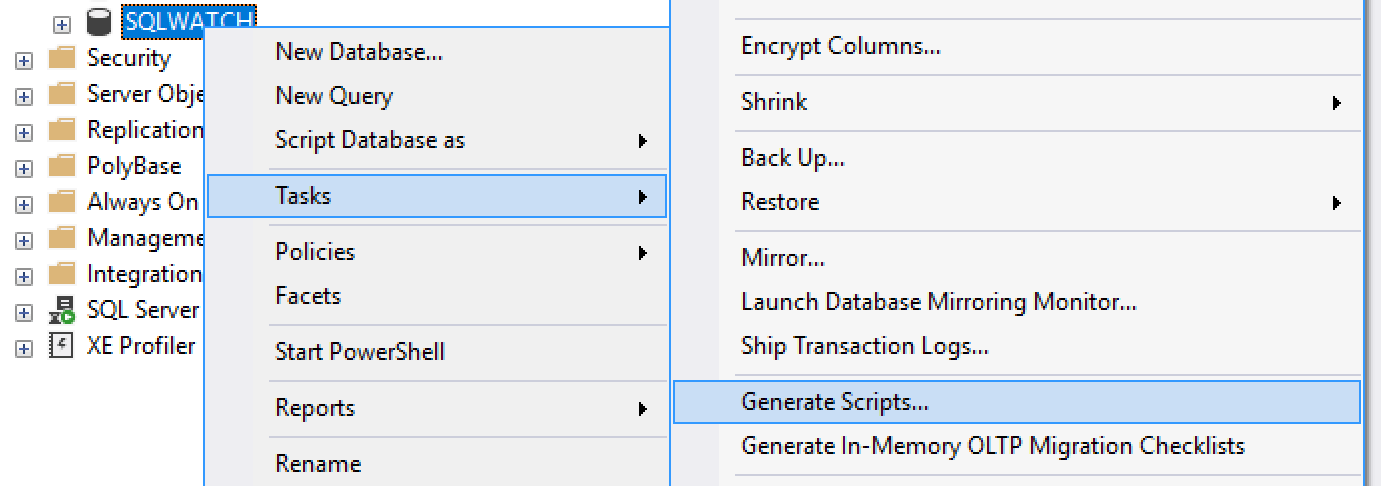
If, for whatever reason, DACPAC option is not possible we can import SQL file. As a developer, you can your friendly DBA to generate database scripts. As a DBA you can do this in a similar way to DACPAC extraction. Right-click database and go to Tasks and Generate Scripts…
Next, make sure you are scripting entire schema:
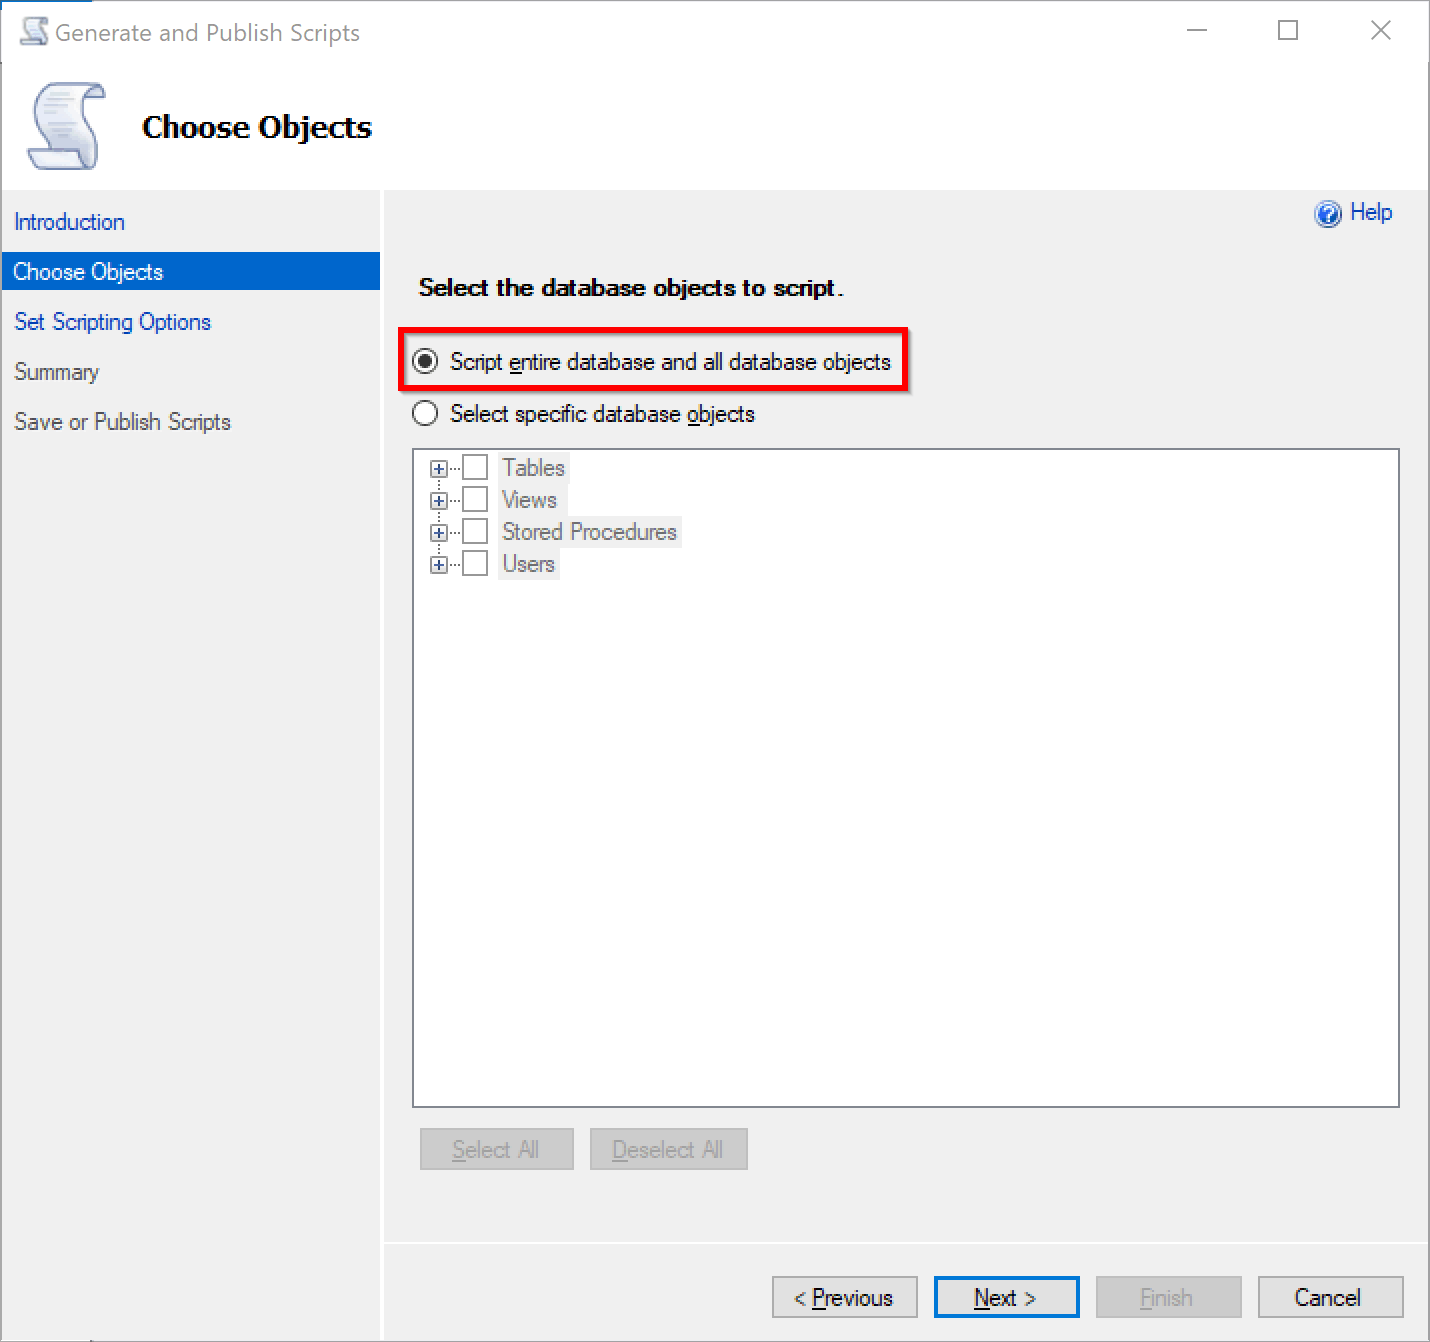
In the next step, before generating scripts, please click Advanced:
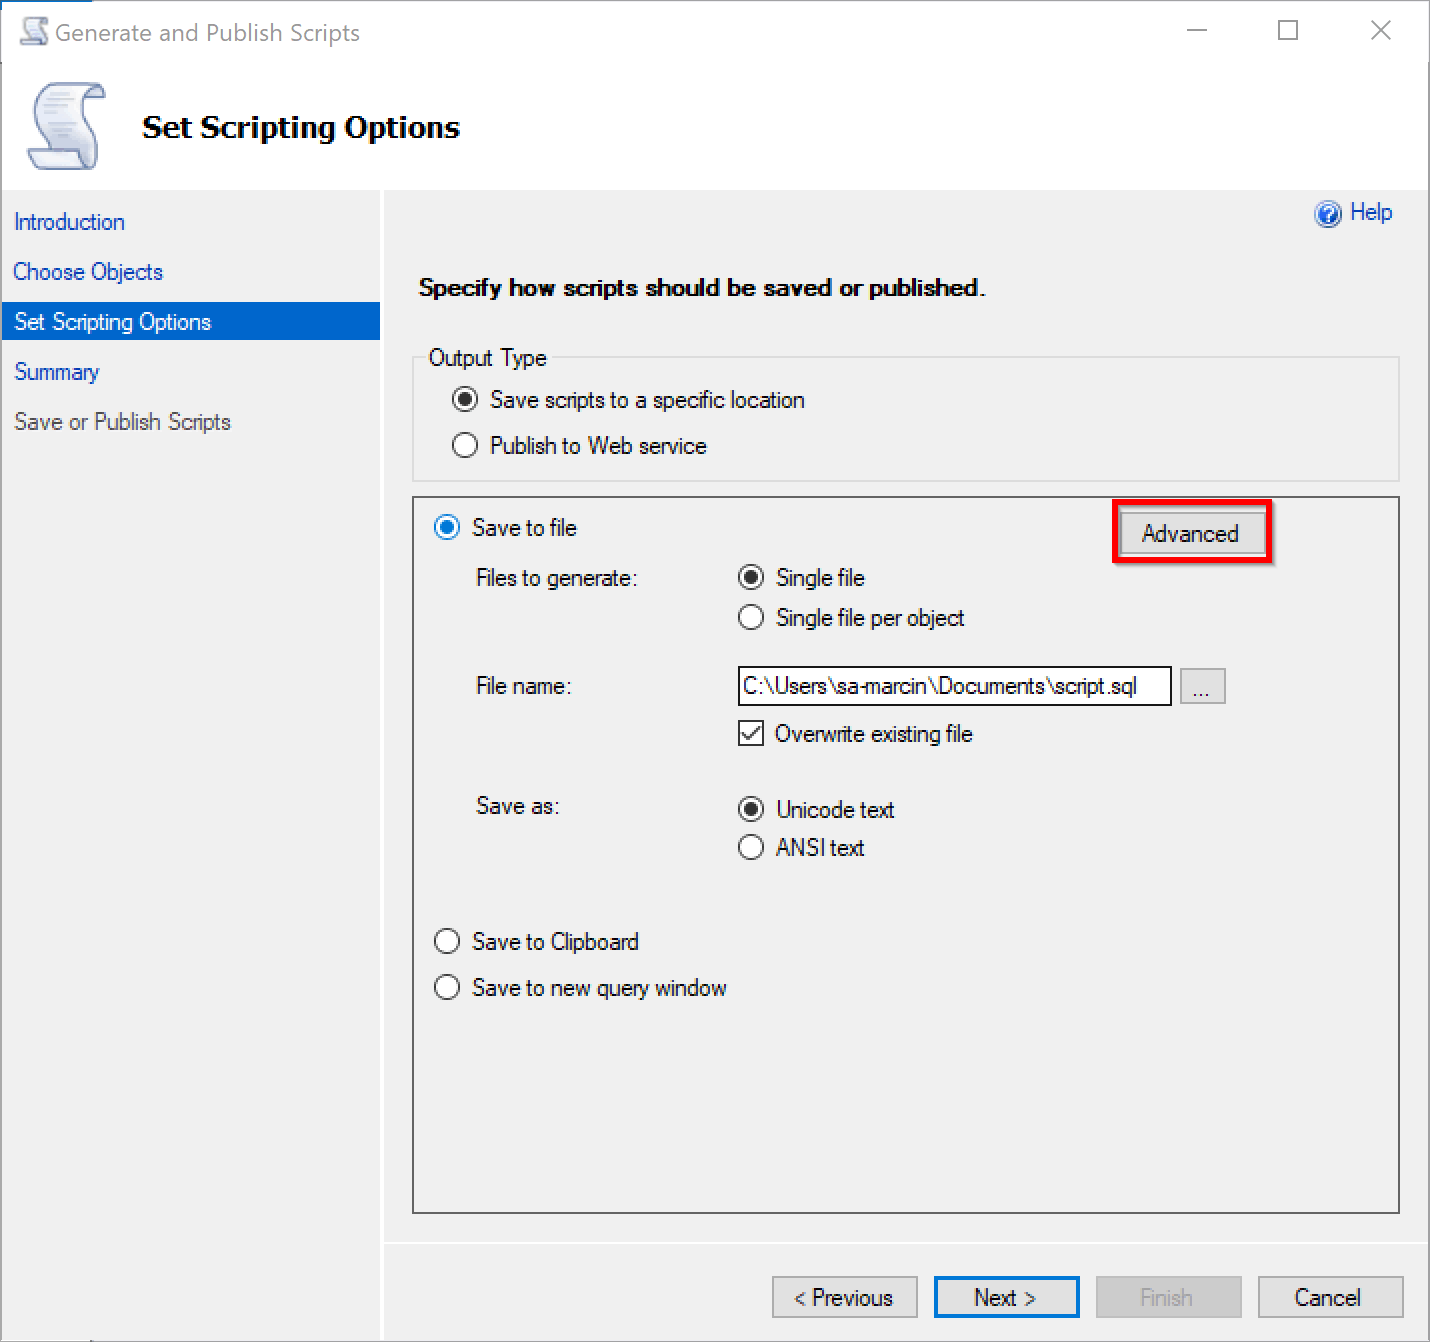
And make sure you have selected schema only the right SQL Server version to generate scripts for:
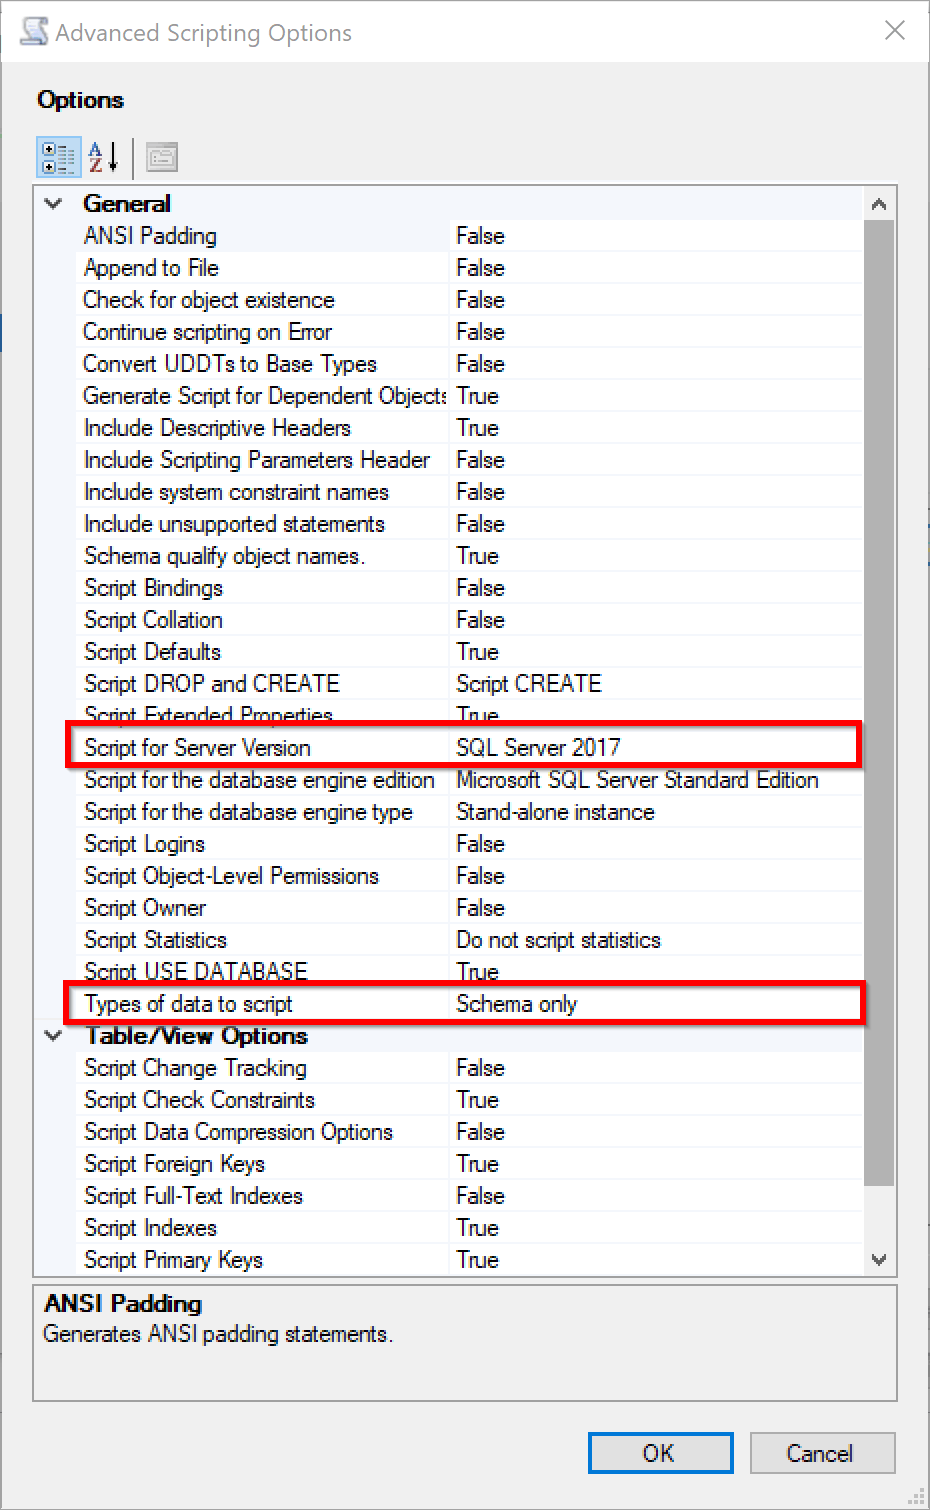
This will generate a SQL Script containing CREATE statements for all objects in the database.
Benefits
I have explained how to get started with Visual Studio and how to import an existing database. In the next section I will focus on why we have done it and the benefits Visual Studio brings into the database development world.
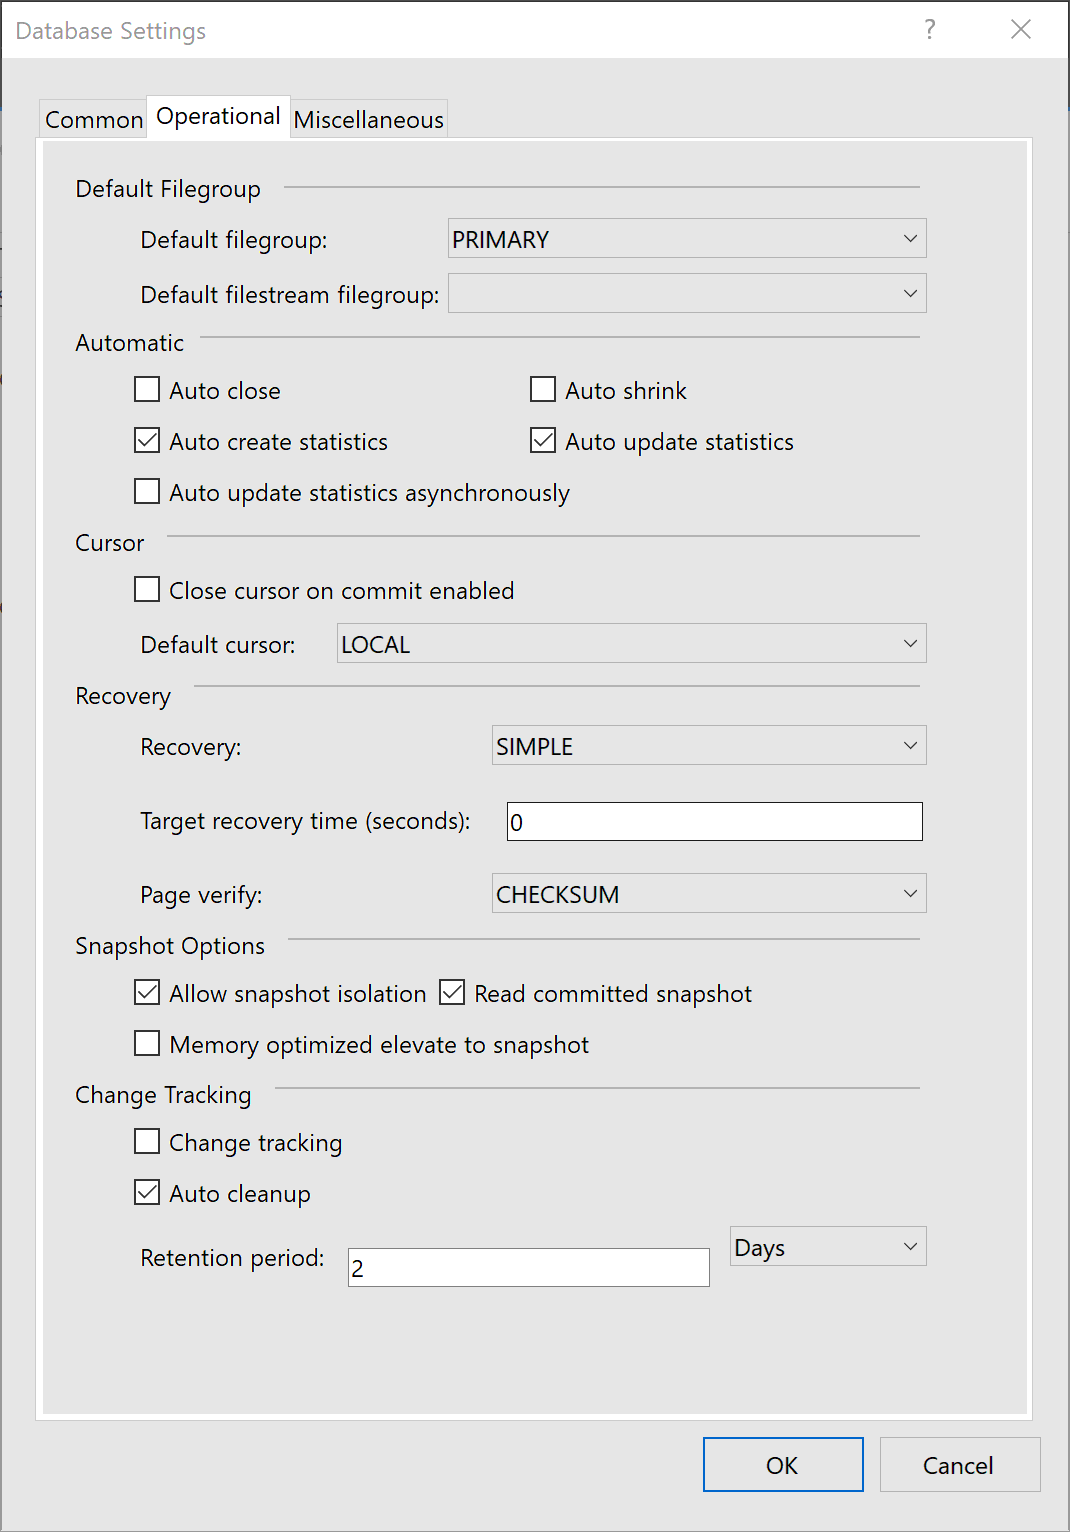
Database configuration
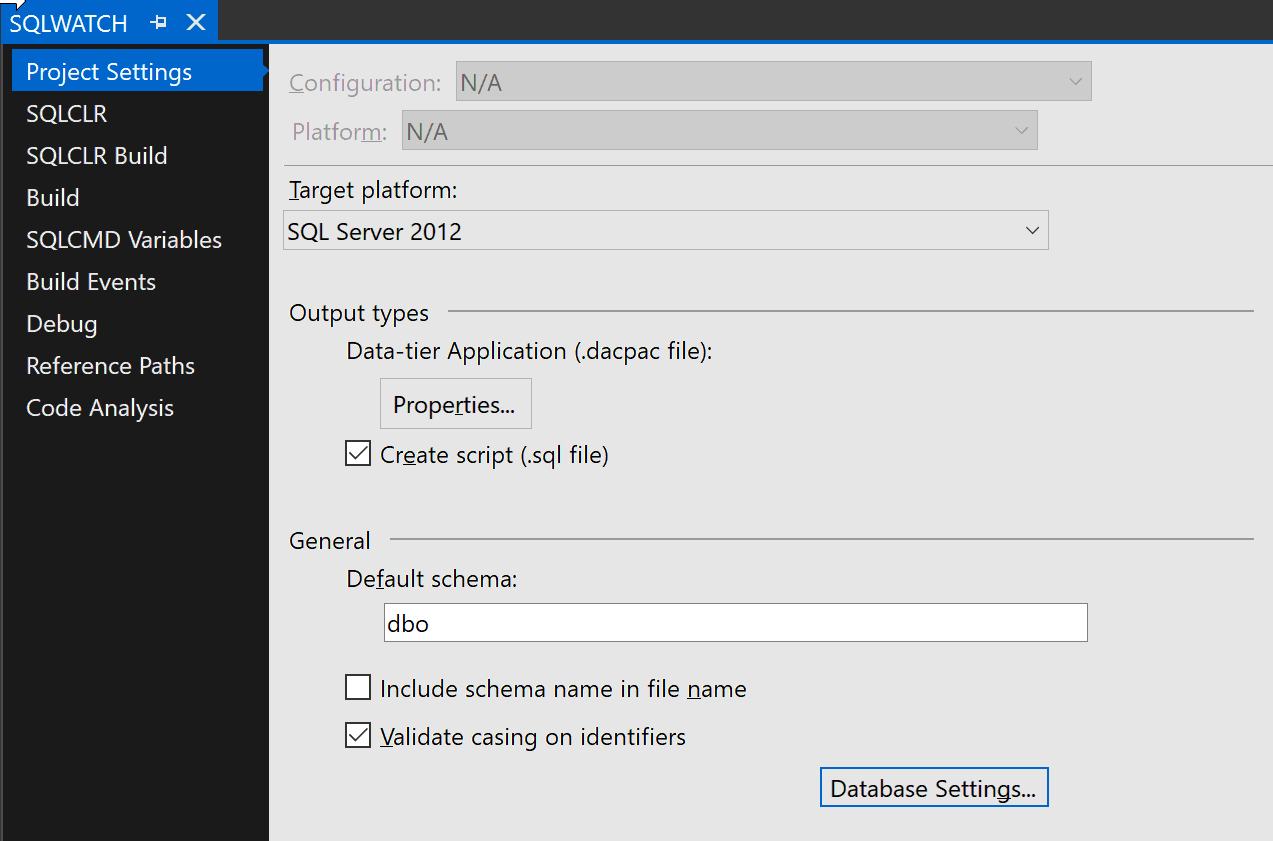
Once you have the database in the Project you will be able to set configuration options. For example, you can set snapshot isolation or enable service broker. The deployment process will take care of all this for you and apply the configuration to the database:
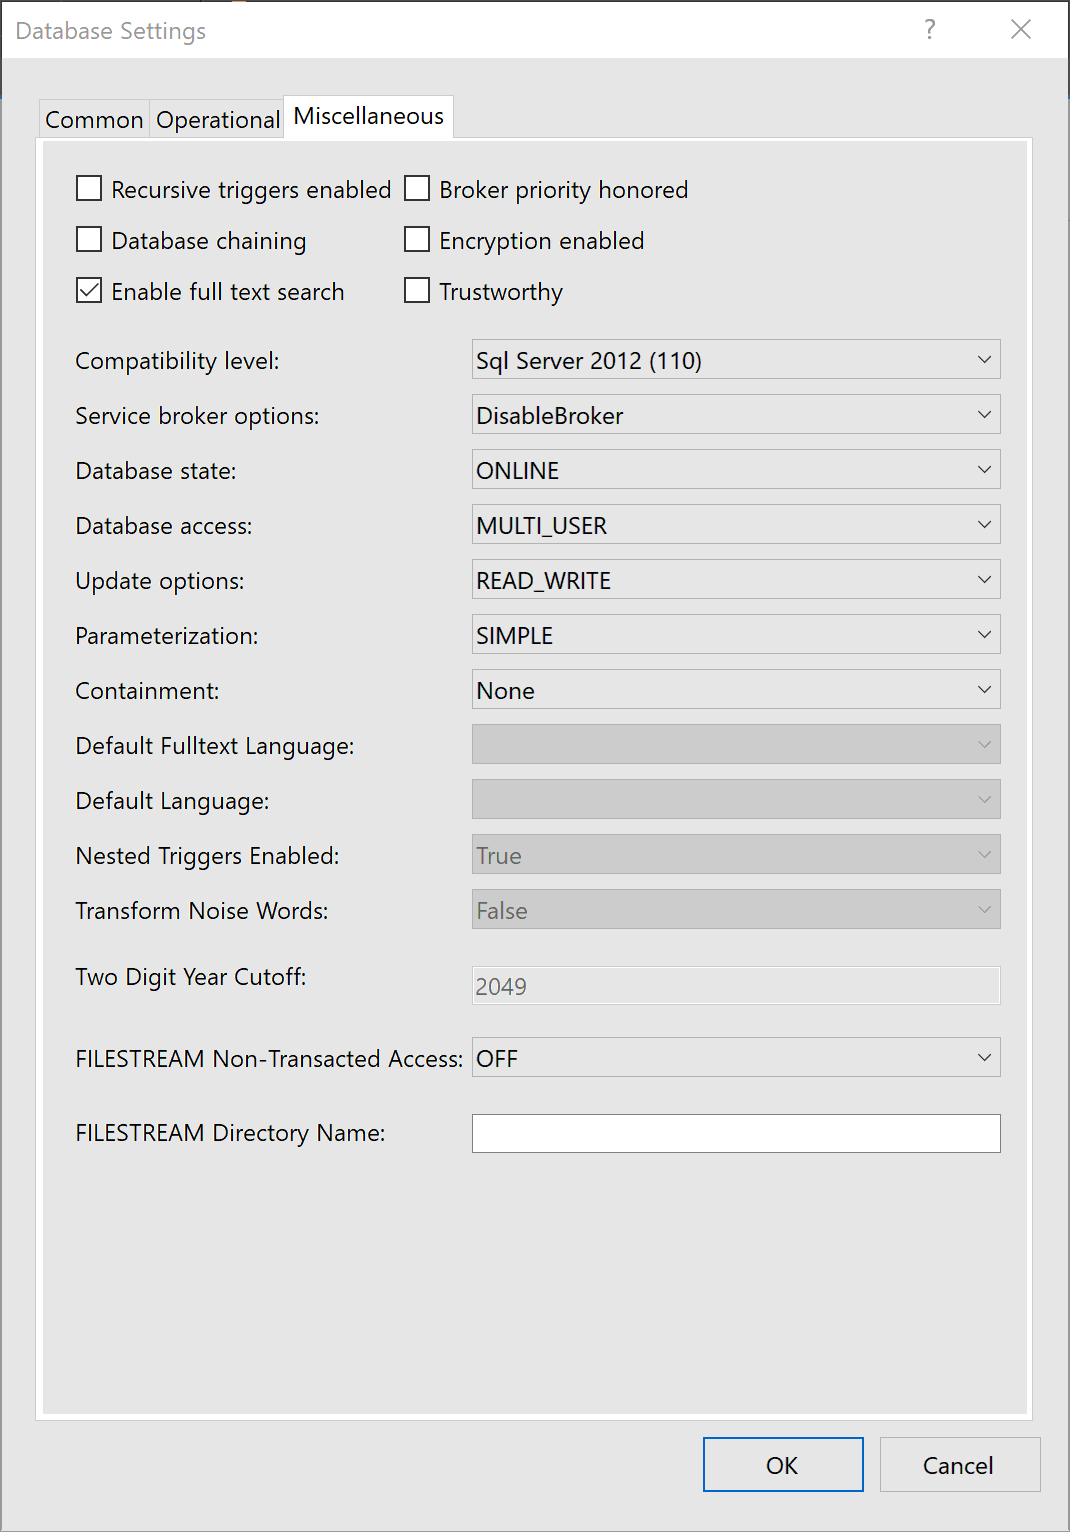
We can also set the target SQL version which will trigger Visual Studio to check that we are using compatible syntax.
If you want to upgrade a database to the newer version of SQL this is a good way to find if it’s using any deprecated syntax. Import database into Visual Studio set the target platform to the desired SQL version and run build.
Source code integration
Visual studio allows for direct integration with the source code, which, in turn, allows for distributed development across a larger team.
Suppose a scenario where two people make changes to the same objects in the database schema. In the case of SSMS, the second person applying changes will likely override changes applied in the meantime by the first person. You can mitigate this risk by using the source control which will do code merge and make sure there are no clashing changes. You will also have added protection provided by the deployment process itself which will detect any changes to the database done outside of the project.
Code Analysis
Visual Studio is clever enough to recommend any potential issues found in the code. These are not errors per se and we would not find the code failing. Think about as an experienced DBA looking over your shoulder and telling you what to tweak.
Code Analysis is available by pressing Alt+F11 or by clicking Build -> Run Code Analysis on Solution
Double-clicking on the issue will open the real piece of code:

It is also possible to create our own validation rules which can be useful to follow company and DBA standards. For example, it can flag up any cross-database federation or alert when using three-part object naming conventions.
Schema integrity validation
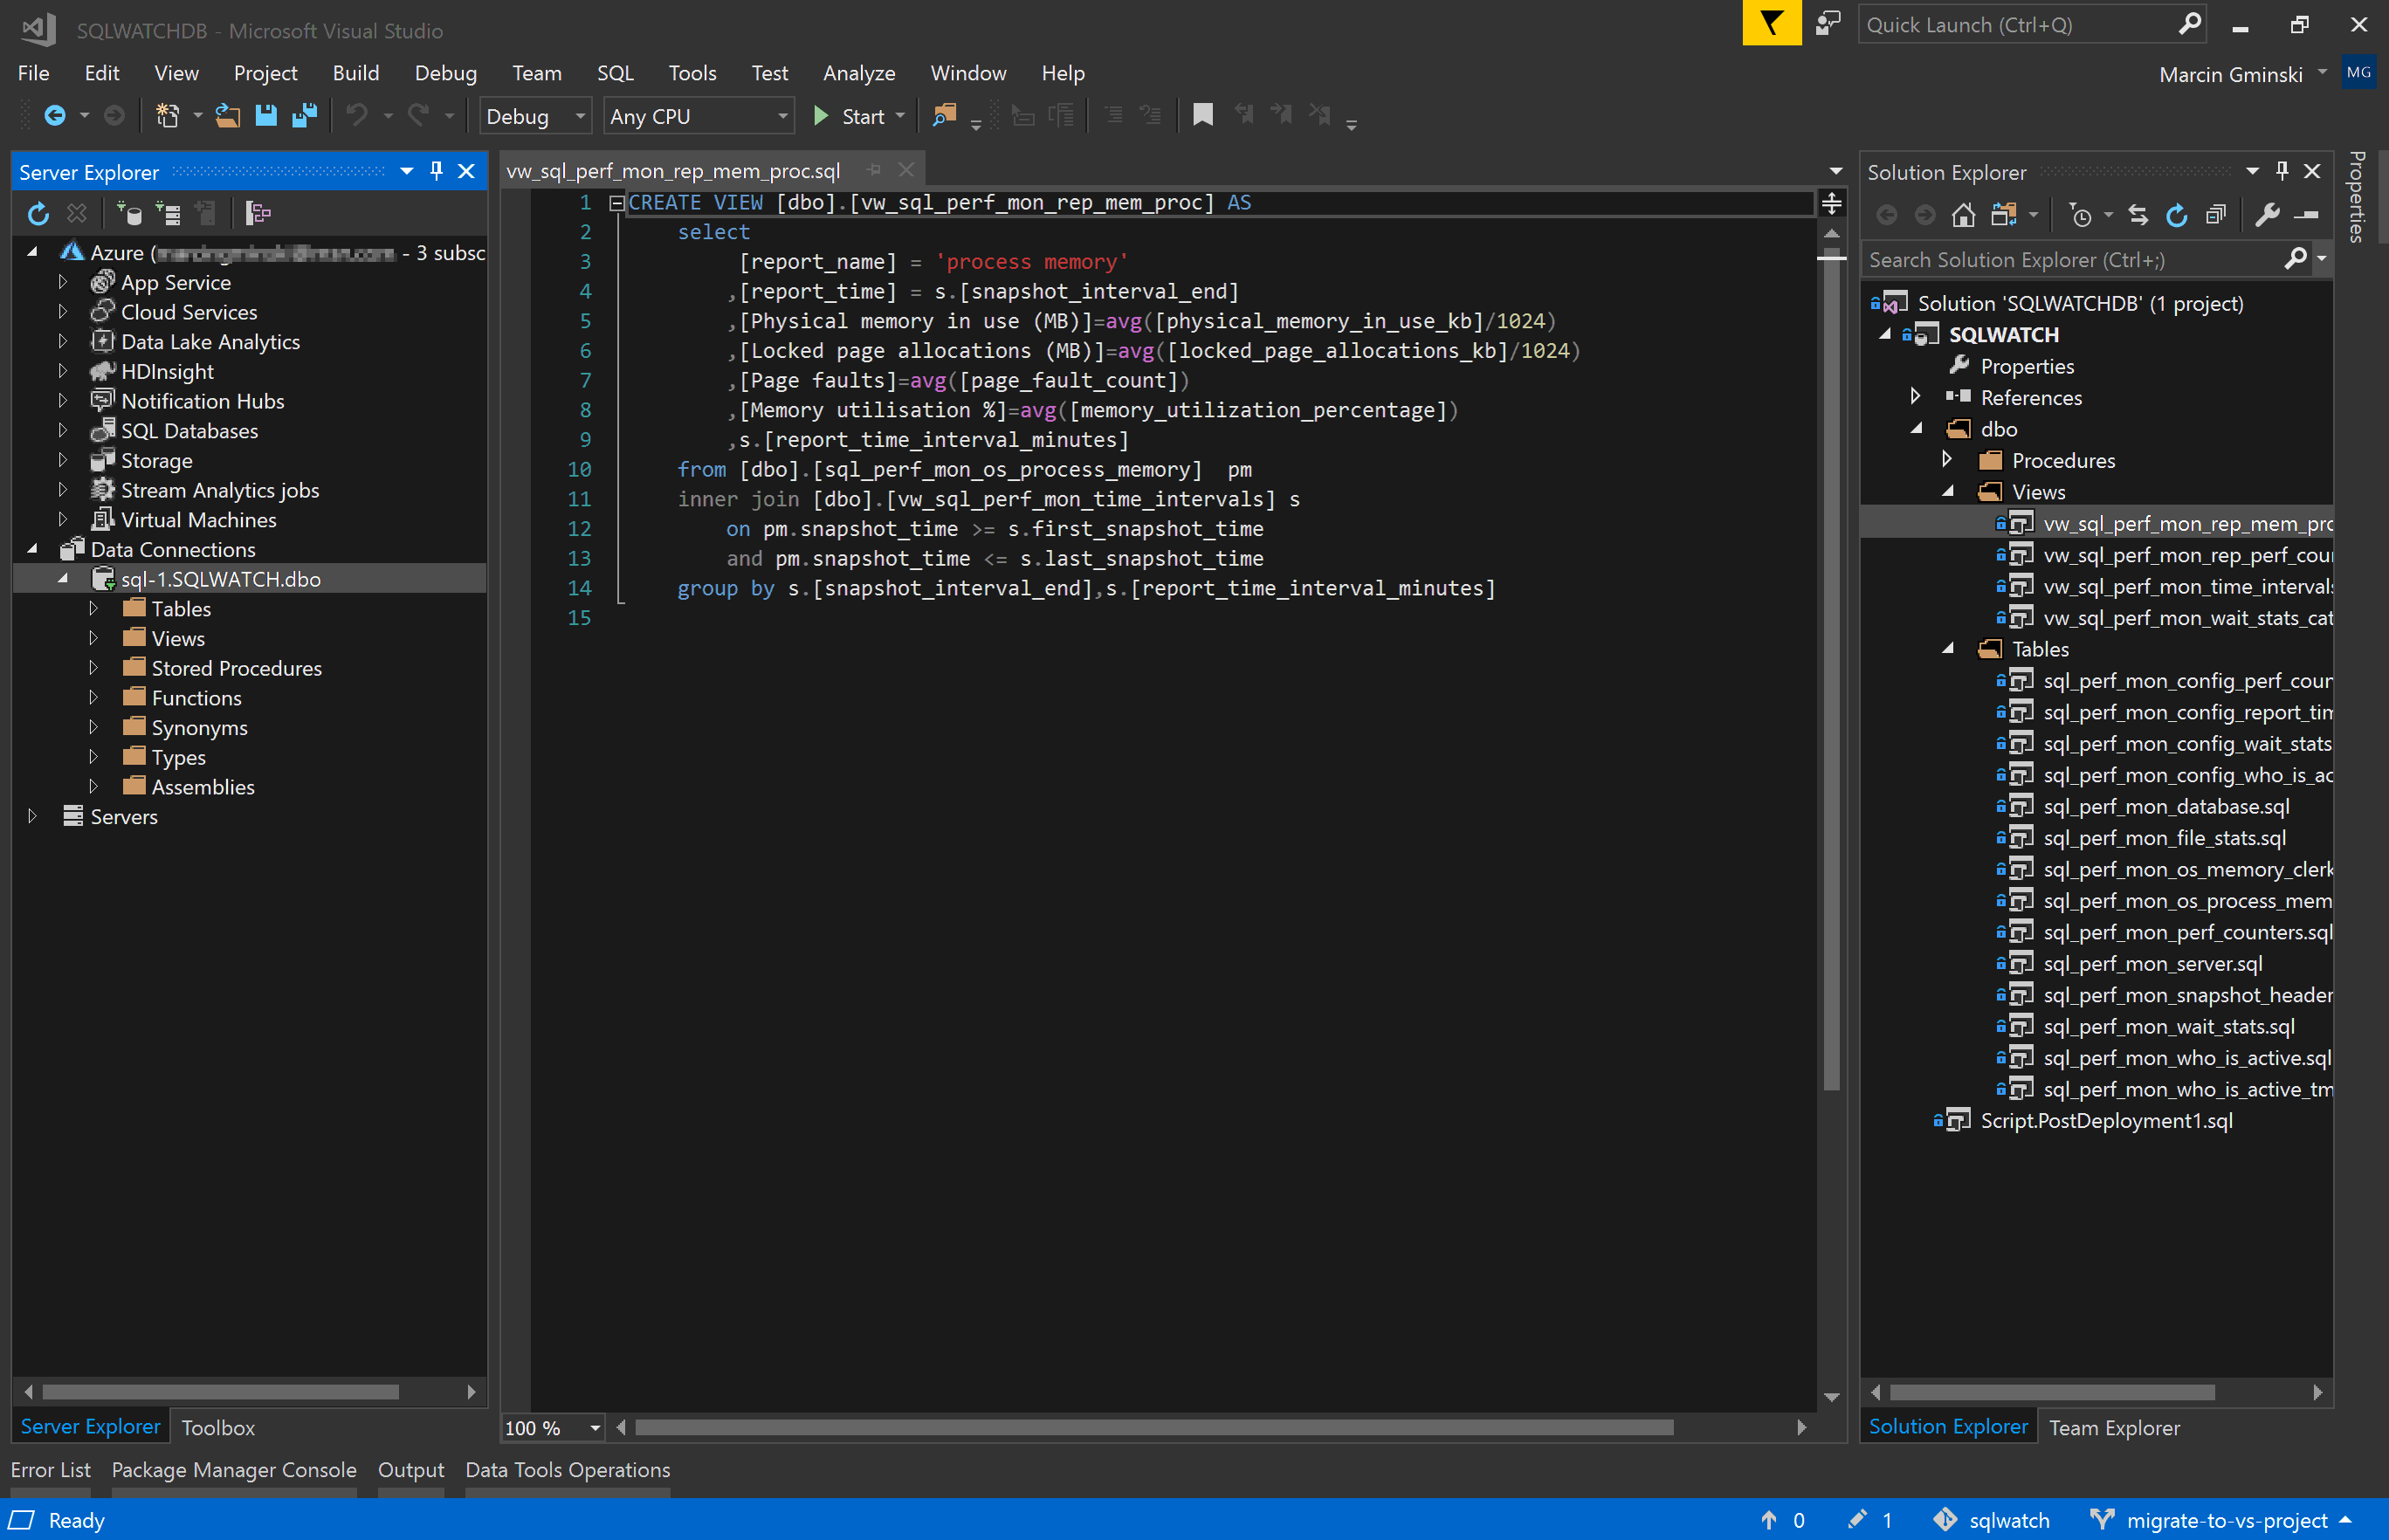
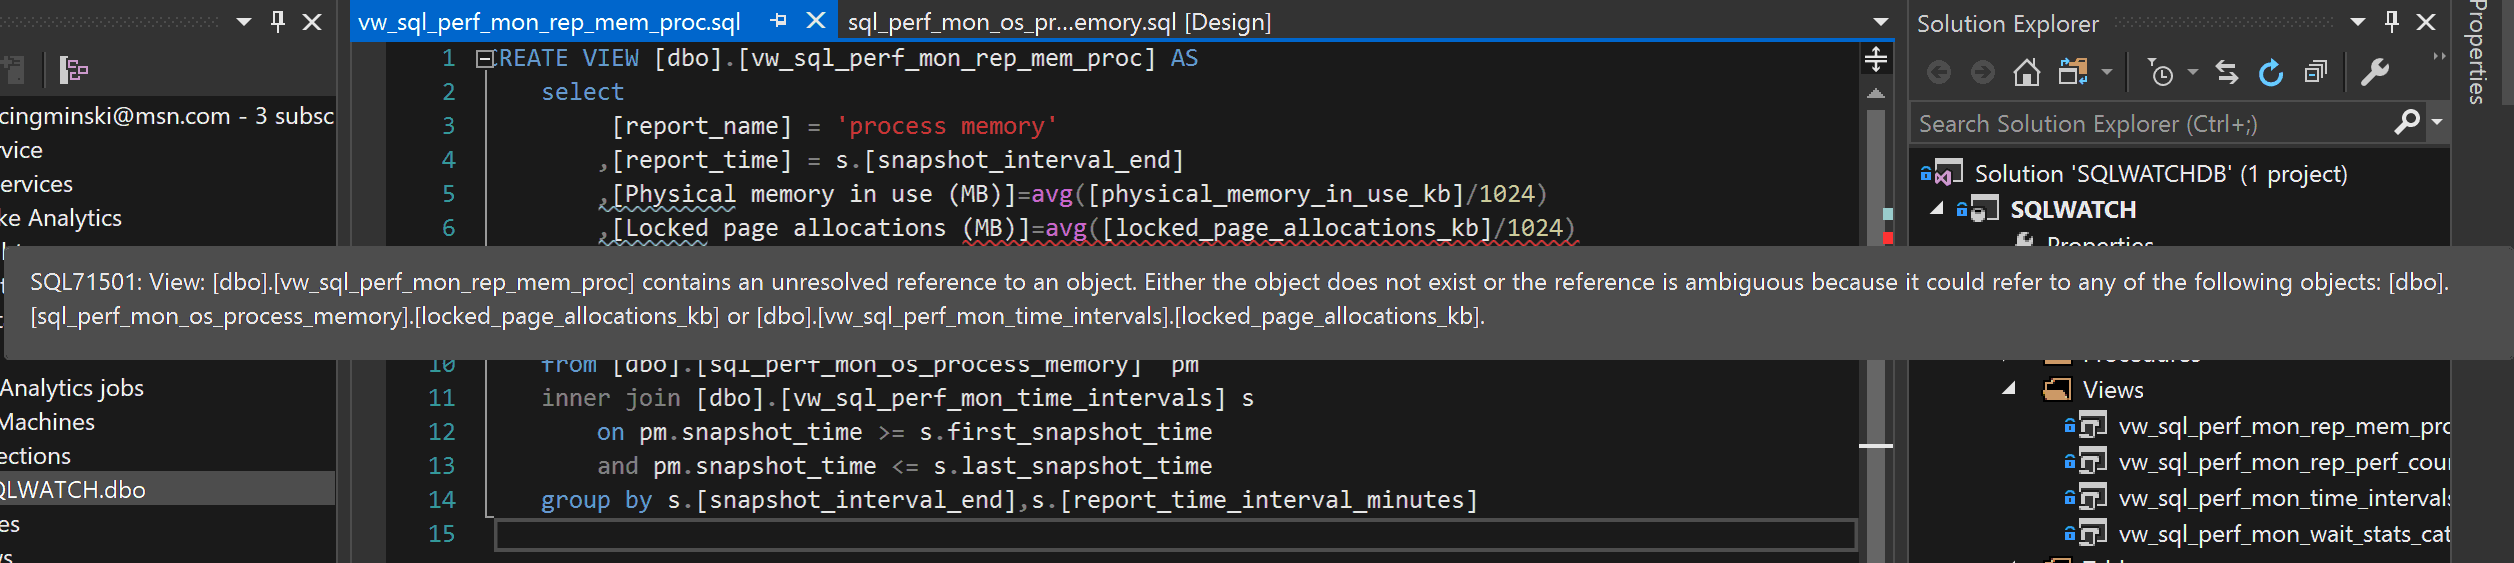
Suppose we want to rename the existing column. This will obviously have an impact on every other object, procedure, view or function using this column. Visual Studio will automatically find all dependencies and linkage and highlight an issue.
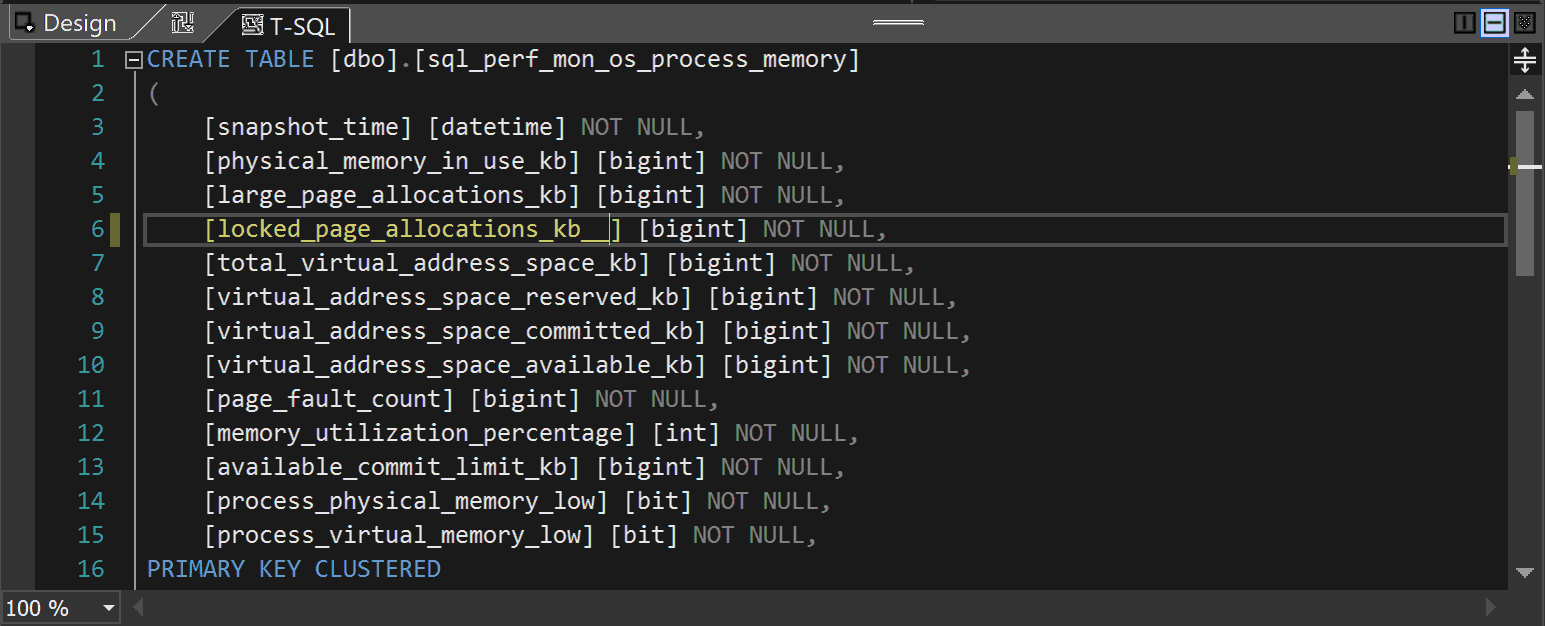
Let’s rename some columns in the dbo.sql_perf_mon_os_process_memory. I have added a couple of underscore characters:
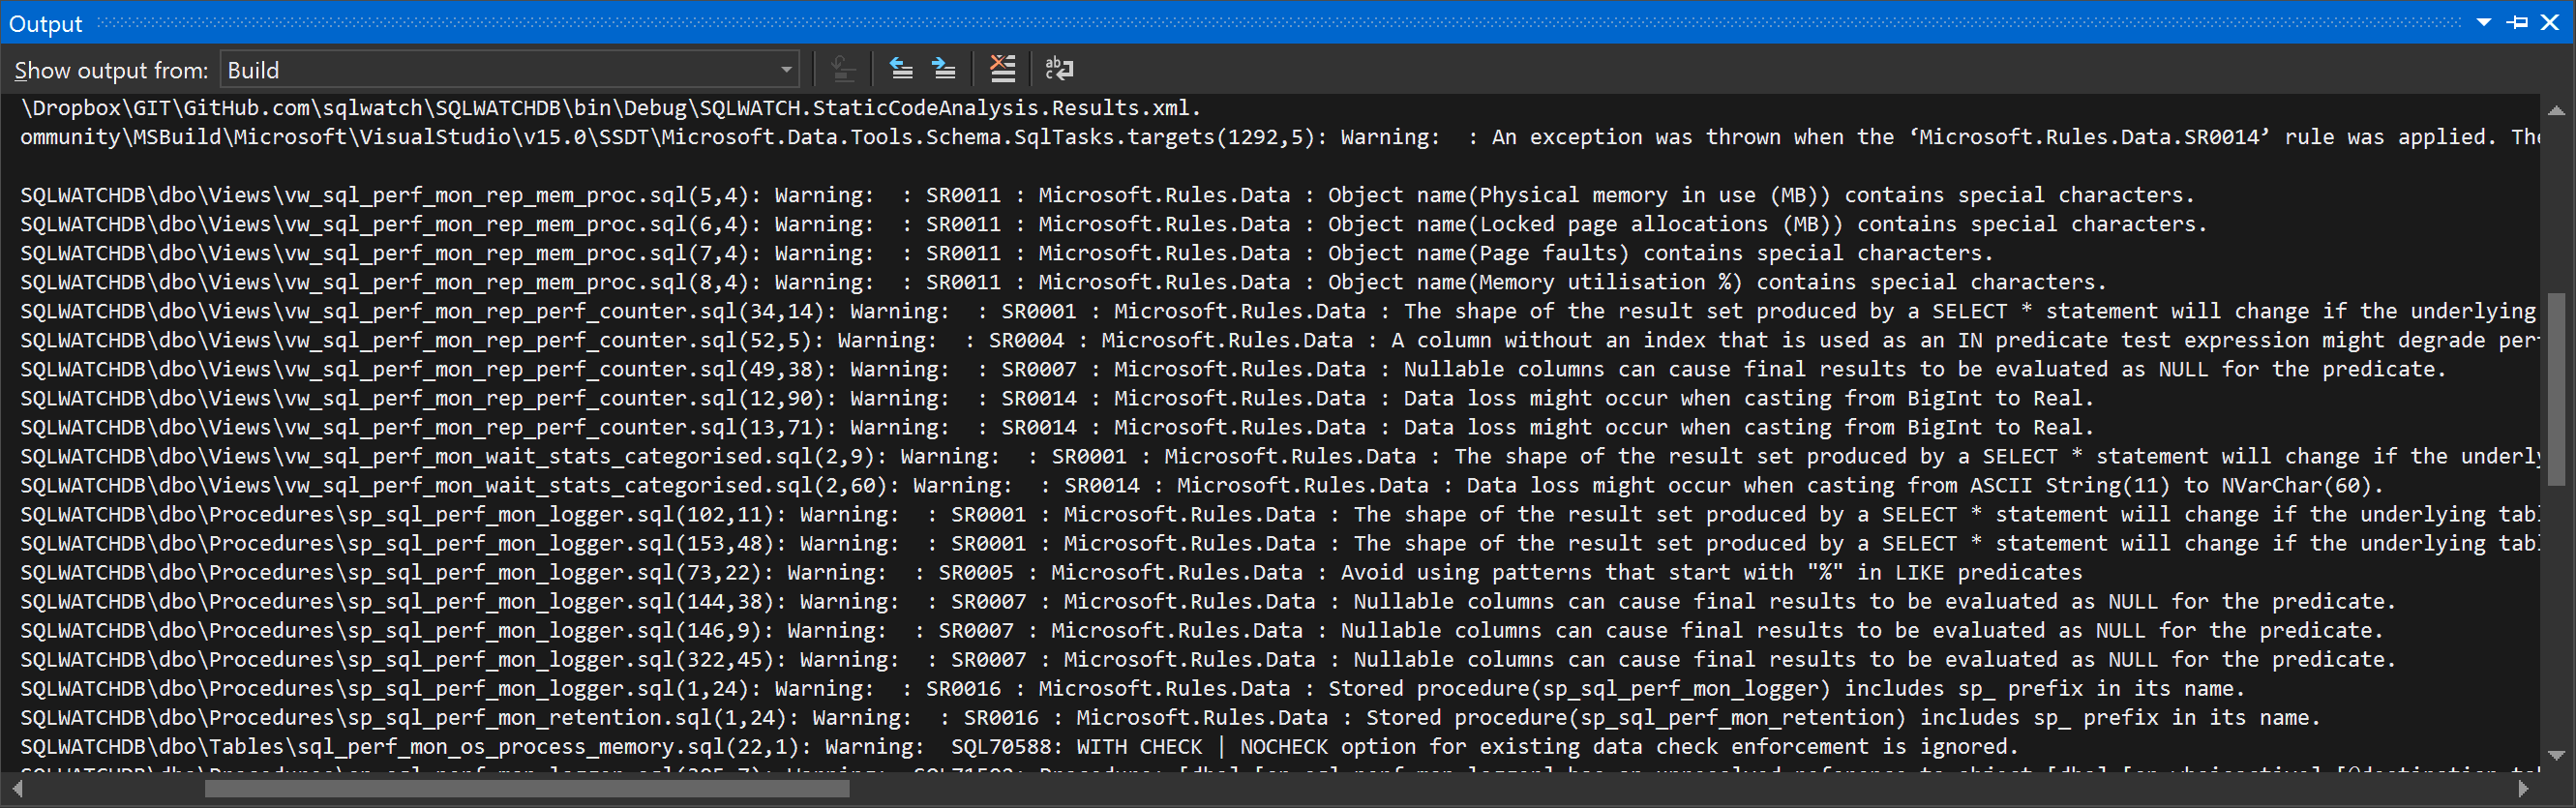
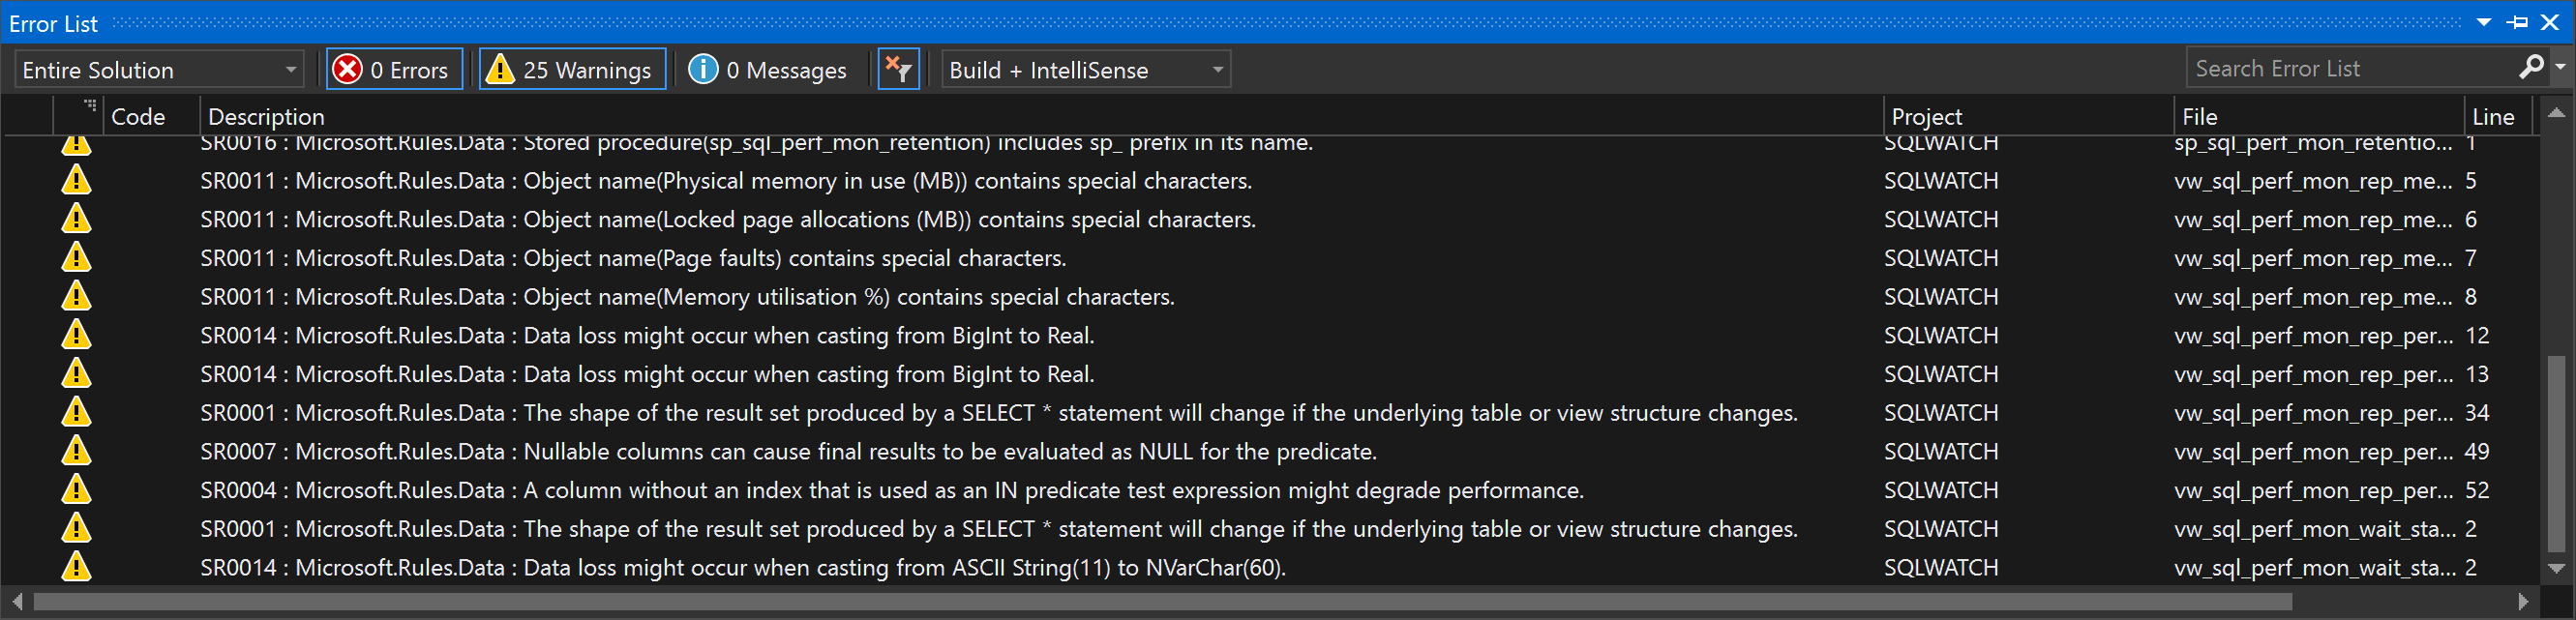
As you can see this not only fails the build but is also being flagged in the view referencing this column:

Schema comparison
We can also use schema compare to find differences between the project and the production database.
Unit Tests
Visual Studio also allows writing integration tests for stored procedures that can be executed as part of the deployment routine. The output of the test will influence the result of the entire deployment.
To create a unit test for a stored procedure, right-click on a stored procedure and click Create Unit Tests. This will open a window where we can select the actual procedure we want to create unit tests for:
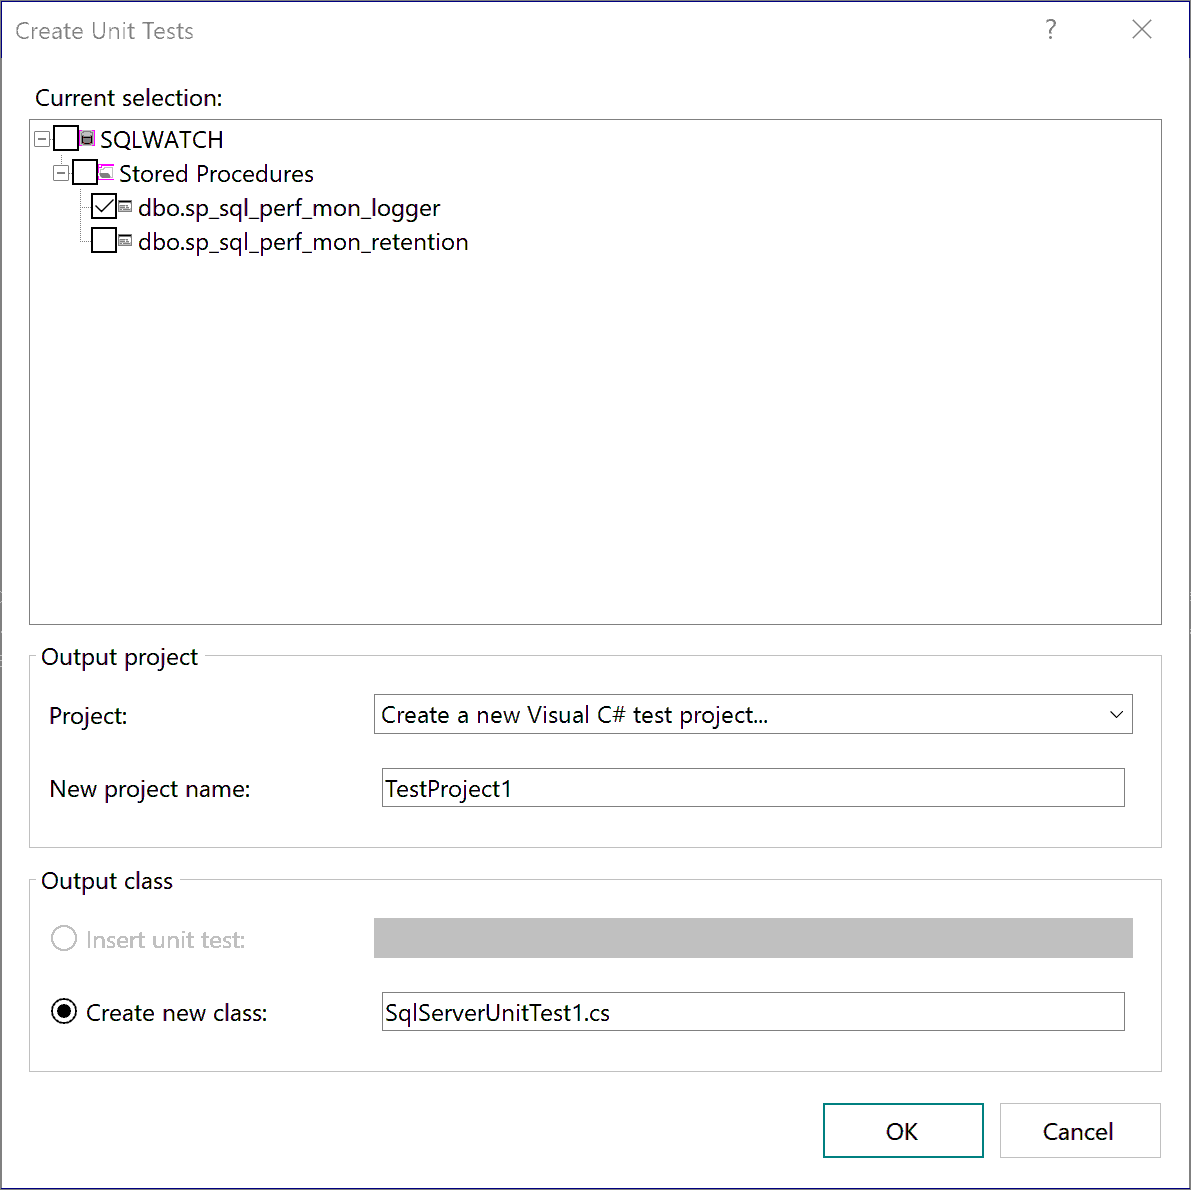
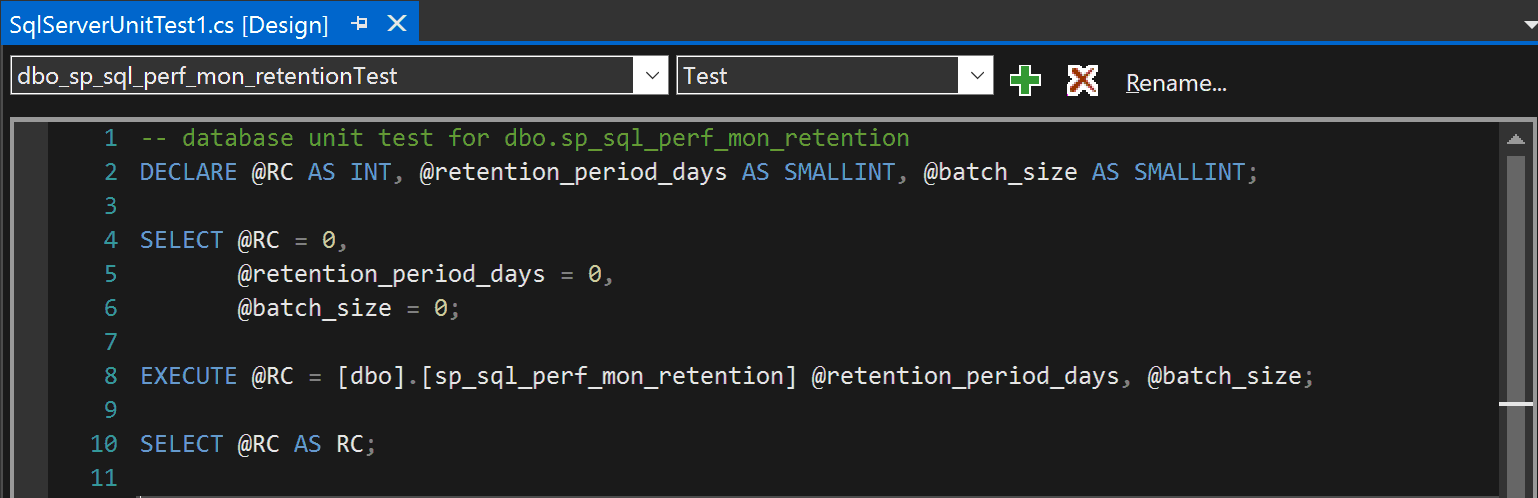
Unit tests are created in C# so not quite a database language but fear not, it is not that difficult. In our example, we are going to create a unit test for the retention procedure as it accepts parameters. Once you have selected procedure to create the test for click OK
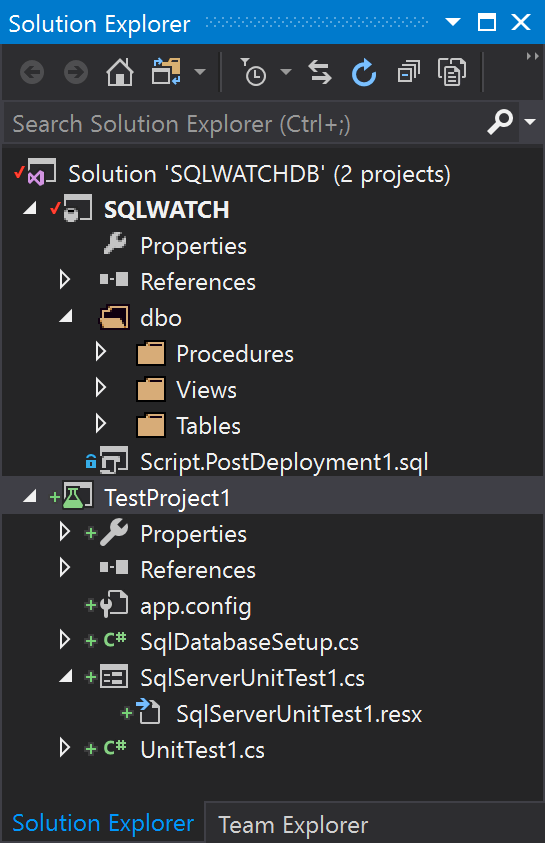
You will notice that we now have a second project in our solution which contains our tests:
Next step is to create a connection to the database where the test will run:
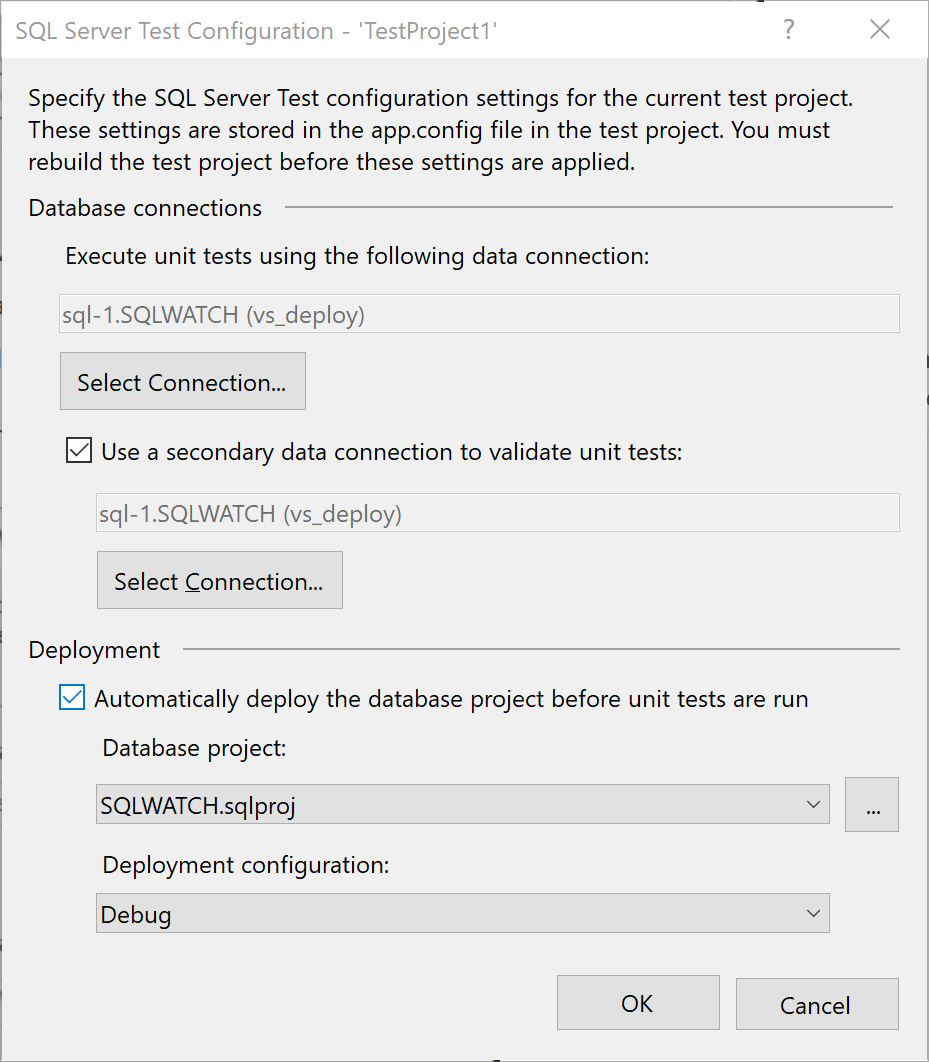
The first connection – “Execute” should use the same account that the production application will use. This will also confirm permissions to make sure that the application will be able to execute the procedure.
The second connection – “Secondary data”. This is a privileged connection to prepare the test and to clean up afterwards. It can also be used to confirm what the first connection did. For example, the application account may only have to EXECUTE permission and not have SELECT access to the schema for security reasons. Suppose we have a stored procedure that inserts data into a table. Successful execution of the procedure does not mean that the test was successful. We have to confirm that the data is also correct. This can be achieved with the secondary account.
After clicking OK we will have automatically generated code that will execute our stored procedure:
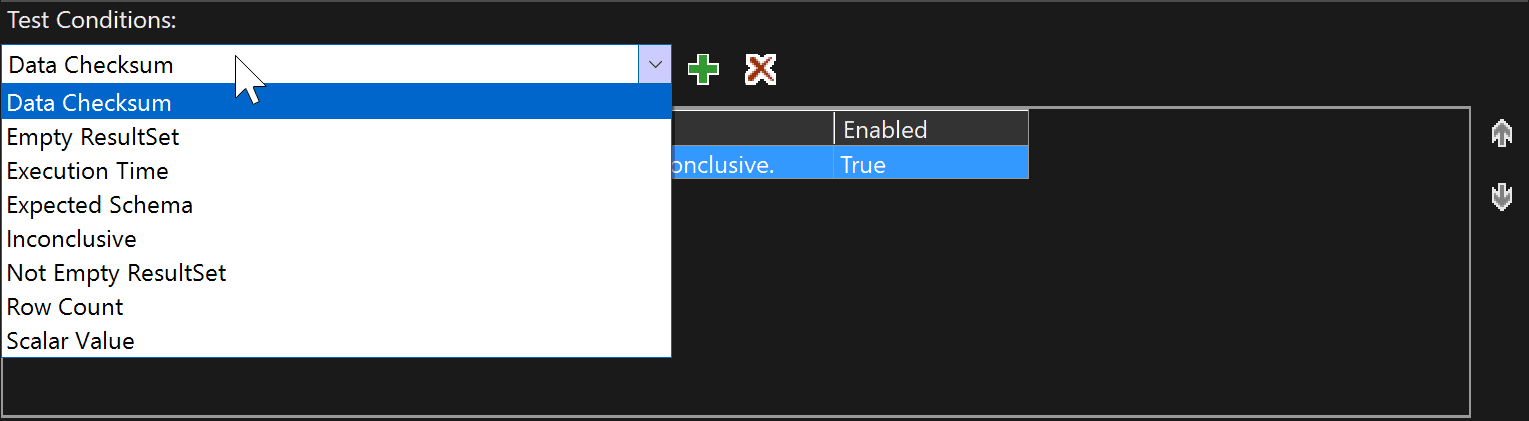
And below we are presented with conditions that will be testing for:
Deployments
Deployments are the biggest strength of Visual Studio. As a production DBA, I remember times where I had to create over a hundred scripts for larger deployments. This could easily take a week alone and what could go wrong! Visual Studio makes this process very simple and easy although with few gotchas that I will explain below.
The concept of deployment is simple. Visual Studio compares the differences between the existing database schema we are deploying to and the schema in the project we are deploying from, and it generates the deployment script.
Direct publishing
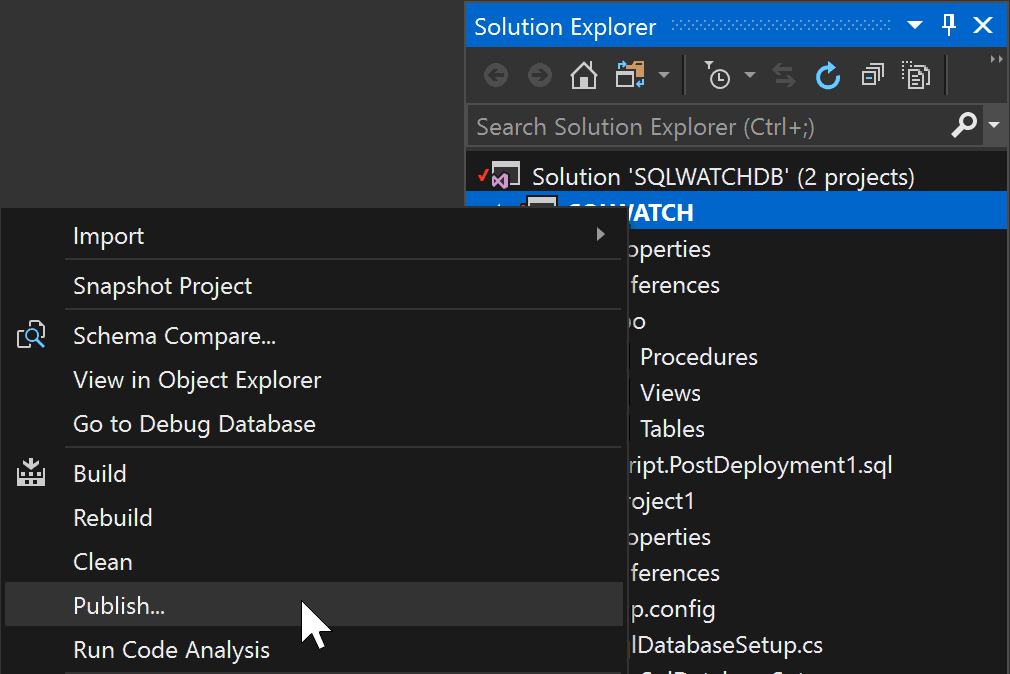
To publish database directly from Visual Studio, right-click the database project and click Publish, selection connection string and desired option and wait a minute or two. You can see the progress in the Output window:
Publishing Options
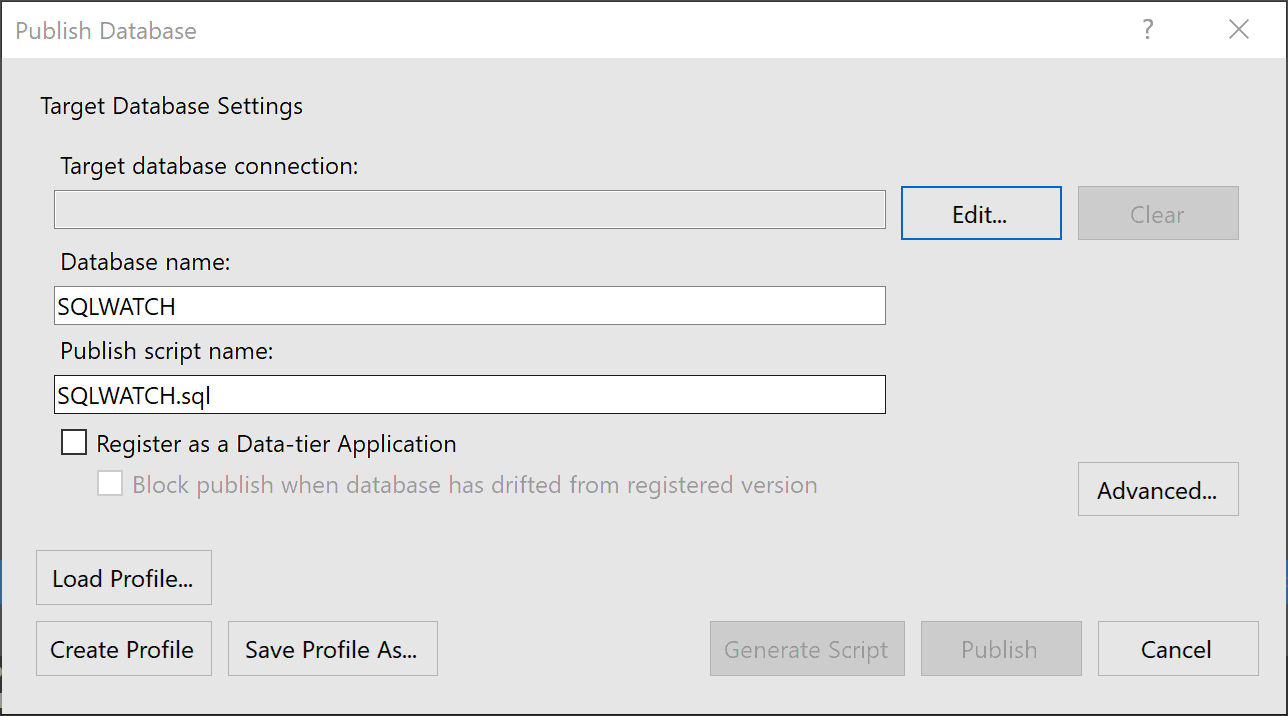
Let’s talk about the Publishing options as this is the key to a successful deployment
Edit – This is where you define sever to which you would like to deploy your database.
Register as Data-tier Application – This will create a record in msdb.dbo.sysdac_instances which will contain the same version number as the one specified in the database project properties:
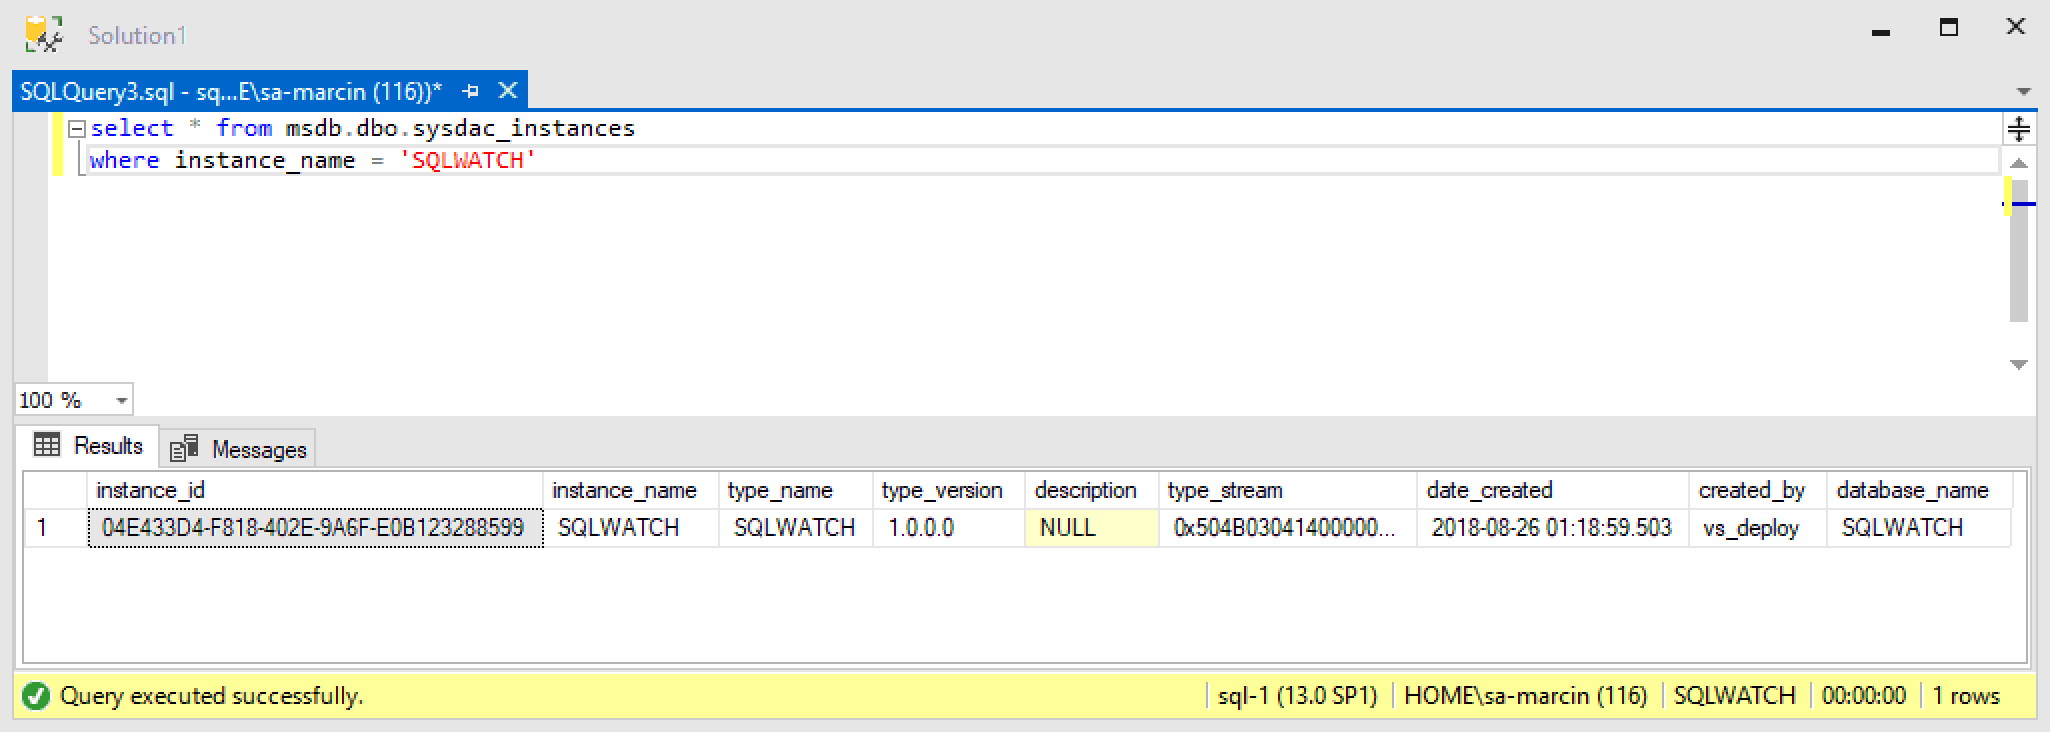
If we do register as Data-tier Application, we will also be able to block the deployment if the production database deviates from the Project. For example, when someone has altered a table directly in SSMS which is not in the project, we can tell the deployment to stop due to the risk of overwriting those changes.
Now the Advanced options:
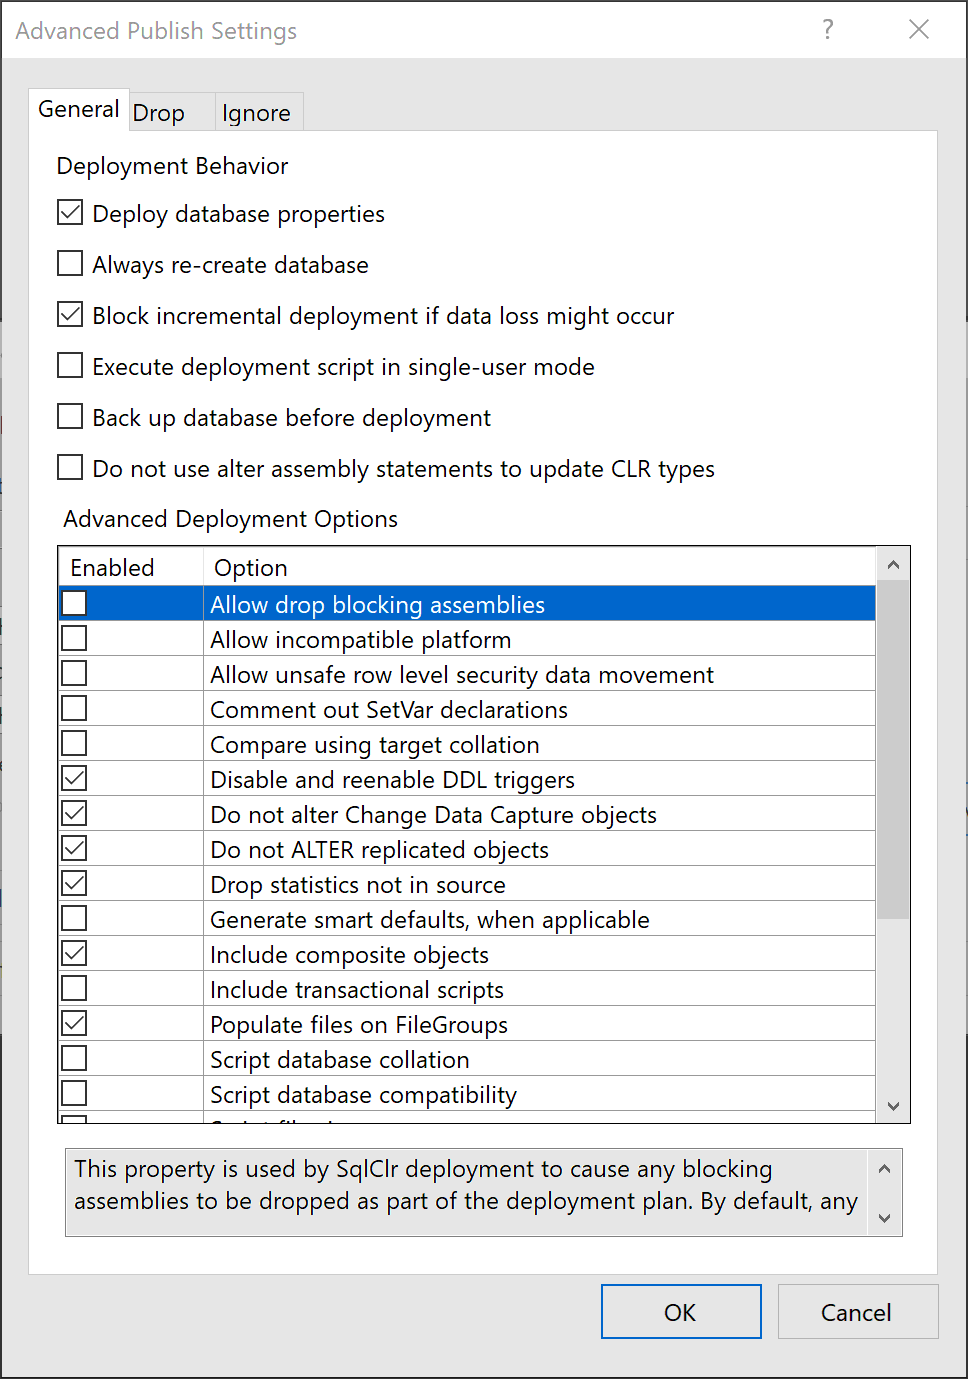
The deployment will not run if there is even a tiny risk of any data loss. This also means that it will NOT drop any tables that contain data or carry out any alter operations that could result in data loss. This is good in general but may cause troubles when you are running CI/CD pipelines and decide to deprecate old tables.
There is also an option to take a backup before the deployment.
On The Drop tab, as the name suggests we have a number of options related to Drop operations:
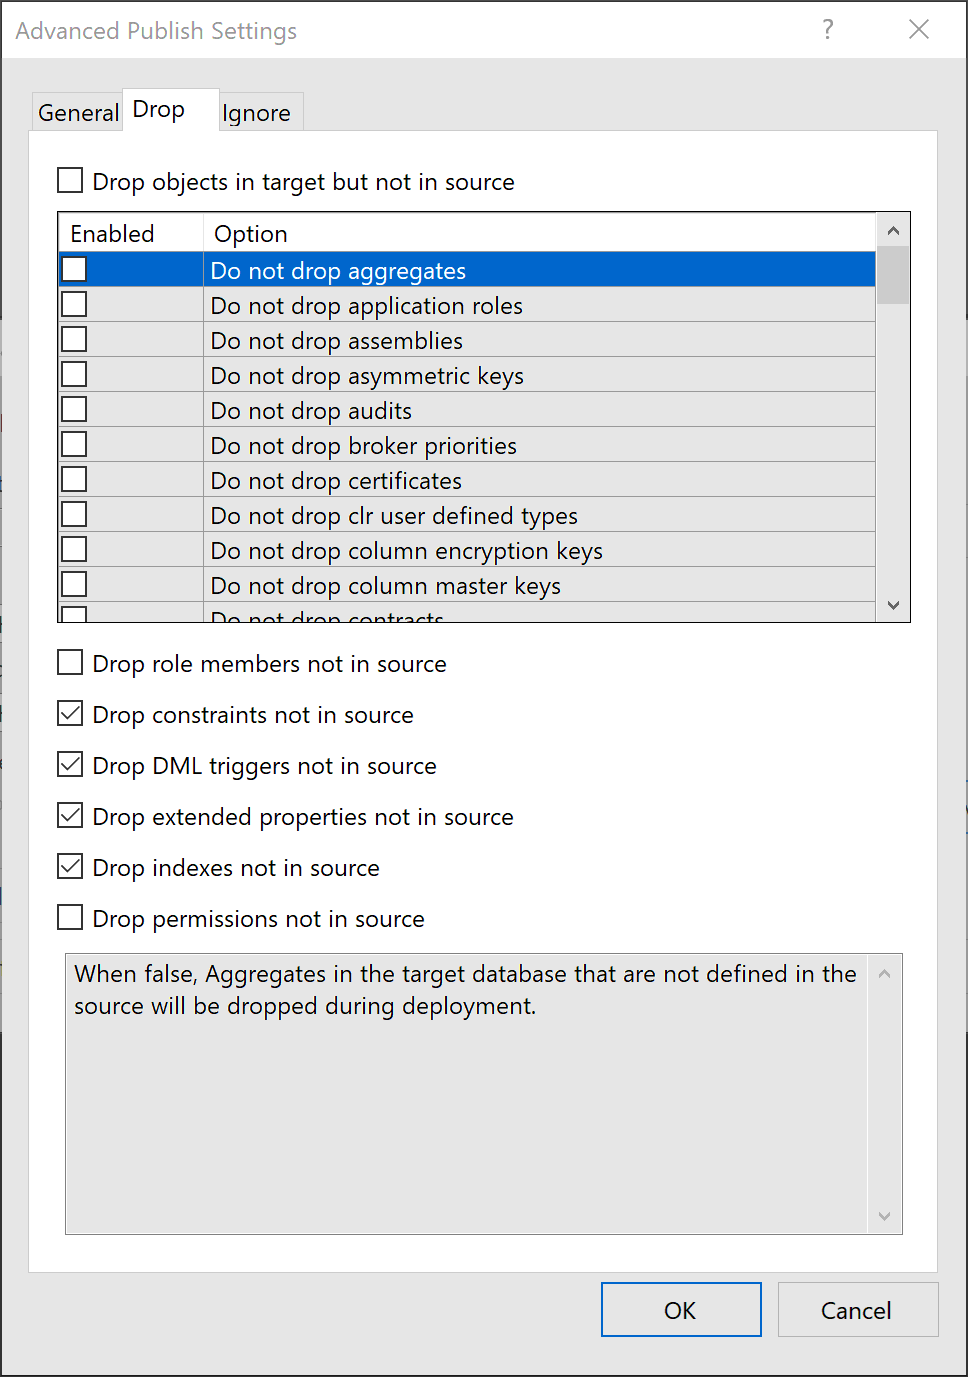
If you remove a table from the project it will not be automatically removed from the database. This is a default behaviour but you can, of course, change it.
You can safely run the deployment with default options. The default options make sure no data is lost. The process is also fully transactional which means if anything goes wrong, the transaction will be rolled back. This means however that large deployment could impact transaction log or even blow it so it is important to not make any changes to the schema that could result in large transactions.
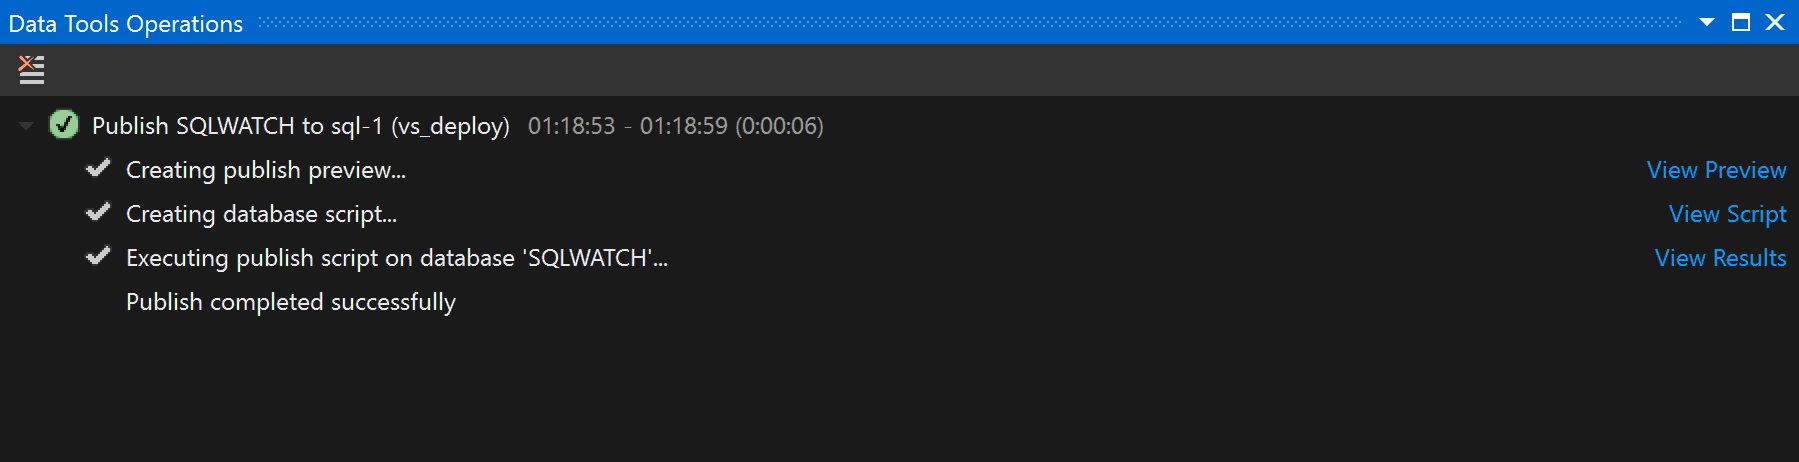
We can see the progress of the deployment in the Data Tools Operations window in real-time:
Script generation
If we do not want to publish the database directly but would like to check a publish script, we have a Generate Script option. This will, as the name suggests, generates a *.sql script but it will not actually execute it. We execute this script in SSMS using SQLCMD mode.
3rd party deployments (via DACPAC)
The default publishing options discussed above involve the use of Visual Studio. Of course, one of the key requirements is the ability to connect to the production server and to have correct permissions to deploy changes. This is often not the case.
I have often worked in environments with separation of duties where DBA are promoting deployments developed by independent teams who do not have access to the production servers. You will have to send your friendly DBA the DACPAC file generated during the build.
The DACPAC is within the SQL Server installation ...binDebugSQLWATCH.dacpac. And the deployment involves executing SqlPackage.exe on any machine, even the server itself as SqlPackage.exe comes with SQL Server. As per MSDN https://docs.microsoft.com/en-us/sql/tools/sqlpackage:
sqlpackage.exe
/Action:Publish
/SourceFile:C:...binDebugSQLWATCH.dacpac
/TargetDatabaseName:SQLWATCH
/TargetServerName:localhost
Pre and Post-deployment routines
Pre and Post deploy scripts can execute any arbitrary code before and after deployment. You can use the pre-deployment script to prepare the environment or apply manual data migration if required. Post-deploy scripts run after the deployment. You can use it to load reference data or to execute configuration routines.
Deployment gotchas
Or more like “Database development gotchas” a.k.a database development best practice. The deployment will simply do what the developer has developed so it is critical to know what to do. Some of the common mistakes I have seen that resulted in blown transaction log or long-running or sometimes failed deployments:
- New columns added in the middle of the table. This always results in a table rebuild during the deployment. The deployment will create a new, temporary table called
tmp_ms_xx_your_table, insert all data from the old tableyour_tablewith all the columns in the right order, drop the old tableyour_tableand renametmp_ms_xx_your_tabletoyour_table. All in a single transaction for consistency. As you can imagine this will not only have a significant impact on the transaction log but can also run for a long time. - Unnamed constraints. The unnamed constraints do not have a name until they are created in SQL Server. When you create an unnamed constraint, SQL Server will give it a random name and the next time the deployment runs it will not recognise it and therefore drop and recreate again. The best practice is to always name constraints. Microsoft has improved in the recent versions I think.
- I have seen a lot of misused post-deploy scripts that execute schema change operations or index creation. If you create an object that is not in the project it will be altered or recreated during the next deployment to match the source project. This is a closed circle that not only does not make sense but also poses a lot of risk to the database.
Final word
I hope this highlights the benefits of using Visual Studio for database development. This is a very broad subject and I tried to bring up the main points. This article does not cover the entire topic of database development in Visual Studio.
This makes my life as DBA very easy as I do not have to worry about deploying hundreds of scripts and makes the changes easy to check.
It also makes my life as a developer easier and allows me to focus on the database schema and the functionality which in turn produces better quality schema.
And before you ask – sadly, however, there are no schema diagrams in Visual Studio.
This post was originally published on April 11, 2020.