Rapid SQL Server test instances with Docker and Azure
As a DBA, developer, and more importantly the creator of SQLWATCH.IO, I need the ability to rapidly deploy and test different SQL Server configurations or test different upgrade variations from one version of SQLWATCH to another. This is quite laborious, time-consuming tasks as I either have to build a new SQL Server instance of a specific configuration, collation etc or use snapshots which increases complexity and flexibility. Docker makes this very easy and quick.
Introduction to Docker
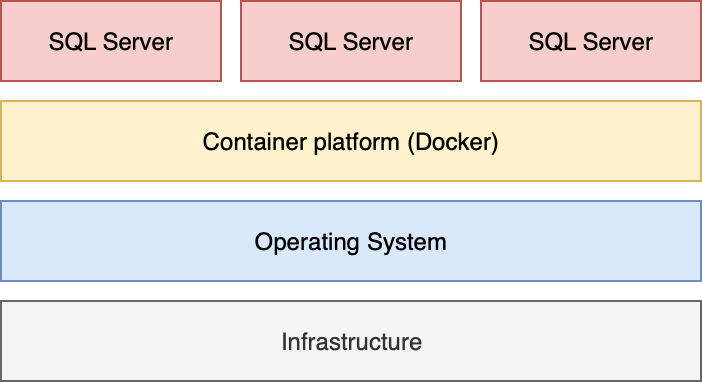
In a very simplified language, Docker is a container (sandbox) platform and it virtualises the Operating System. Container, however, is a packaged image of an application, in our case, this will be SQL Server. Images run in isolation and each can have different resource allocation i.e. different memory, CPU and disk space. Docker uses the internal network to allow containers to communicate with each other and with the external world. We can start and stop containers on demand.
The main difference between running the application as Container vs natively installed is the isolation and lack of package dependencies. We could have two applications using let’s say different versions of Python in isolated containers. If both applications were natively installed, we would have to also install and keep up different versions on Python, local variables, etc. This could get difficult.
Containerisation platform architecture:
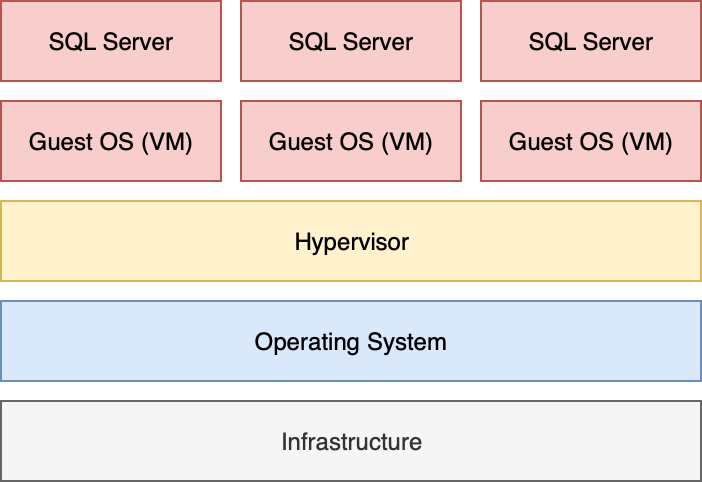
In contrast, the popular hypervisors such as VMware and Hyper-V emulate the hardware. This means that each virtual machine gets a piece of the host memory, CPU and disk and must run its own Operating System. It gives the benefit of being able to run virtual machines with different operating systems such as Linux or Windows but is also more complex and resource hungry.
Traditional Hypervisor architecture:
Getting started
The easiest way to get Docker is to download the free Docker Desktop. Once installed, we can download a specific image (container) from the Docker Hub:
To pull Microsoft SQL Server image:
sudo docker pull mcr.microsoft.com/mssql/serverIn order to start the image, i.e. run SQL Server from the image we just downloaded:
sudo docker run -e 'ACCEPT_EULA=Y' -e 'SA_PASSWORD=yourStrong(!)Password' -p 14331:1433 -d mcr.microsoft.com/mssql/server:2017-latest --name sql-1Where -e stands for environment variable(s) or, in other words, parameters we pass into the image, -p stands for TCP port on which our SQL Server will listen, -d stands for detached mode i.e. run in the background and the optional -name is to name your container. If you do not name it, Docker will give it a random name. You can find full reference in Docker’s documentation: https://docs.docker.com/engine/reference/run/
You may have noticed that the parameters -e are actually SQL Server installer variables and we are agreeing to the EULA and are setting the sa password. These are the least required parameters to run SQL Server.
Ports
Because Docker runs its own network and its own gateway and NAT it has one external IP – the one we are connecting to, which is also used to connect to Containers. The way we connect to different Containers is by giving them different ports.
For example, let’s say we have 2 SQL Servers: sql-1 and sql-2 running in Docker. Each SQL Server listens on TCP 1433 within the Docker network but we can only have one 1433 on the external Docker interface. In order to connect to both instances, we have to do some port mapping and:
- Expose port 1433 from sql-1 as port 14331 on the external Docker interface
-p 14331:1433 - Expose port 1433 from sql-2 as port 14332 on the external Docker interface
-p 14332:1433
This is like opening ports in your router to allow external service, Remote Desktop etc.
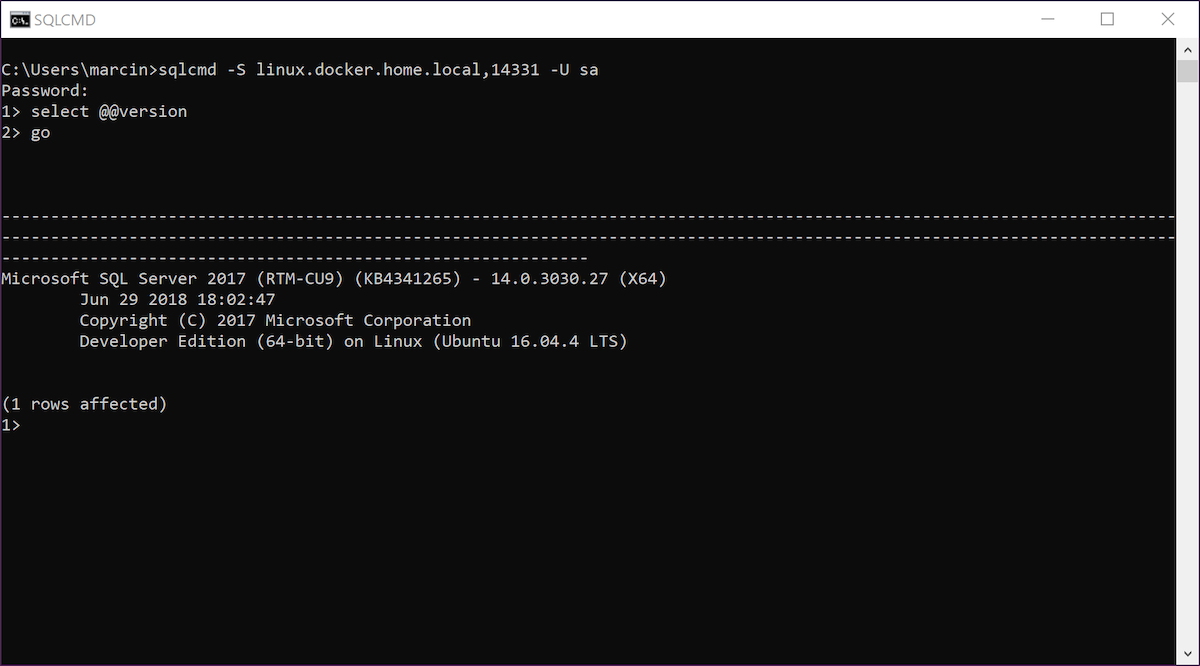
We can now connect to the SQL Server instance as we would normally do:
Logs
Docker provides a very easy way to check logs, in our case this will be SQL Server ERRORLOG:
sudo docker log sql-1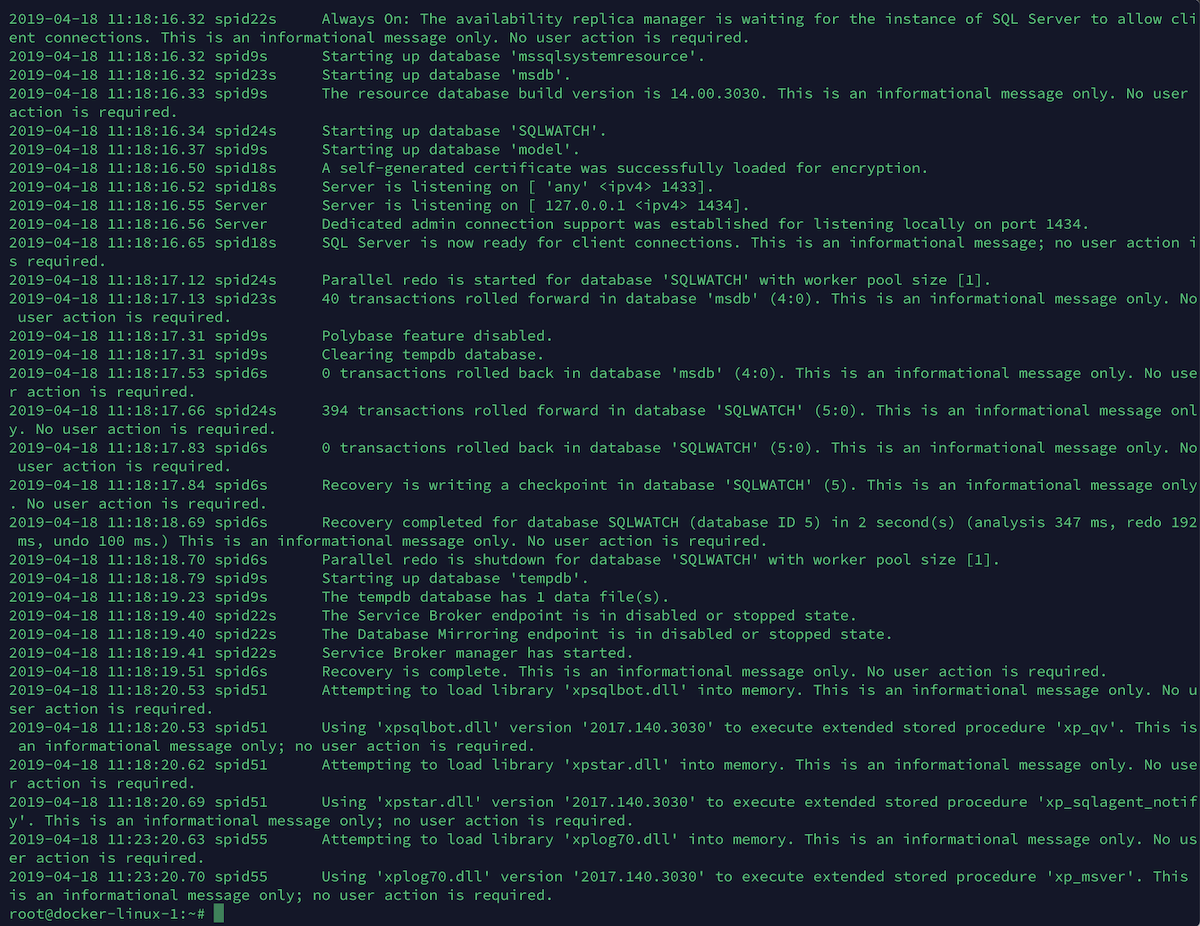
Manage Containers
Most of the Docker management happens in a command line. Whilst this is good for templating, consistency and automation, it’s not that good for random tests cases.
There are different applications to manage Docker containers, I use Portainer.
Portainer is a Container itself. To run it (https://www.portainer.io/installation/)
sudo docker volume create portainer_data
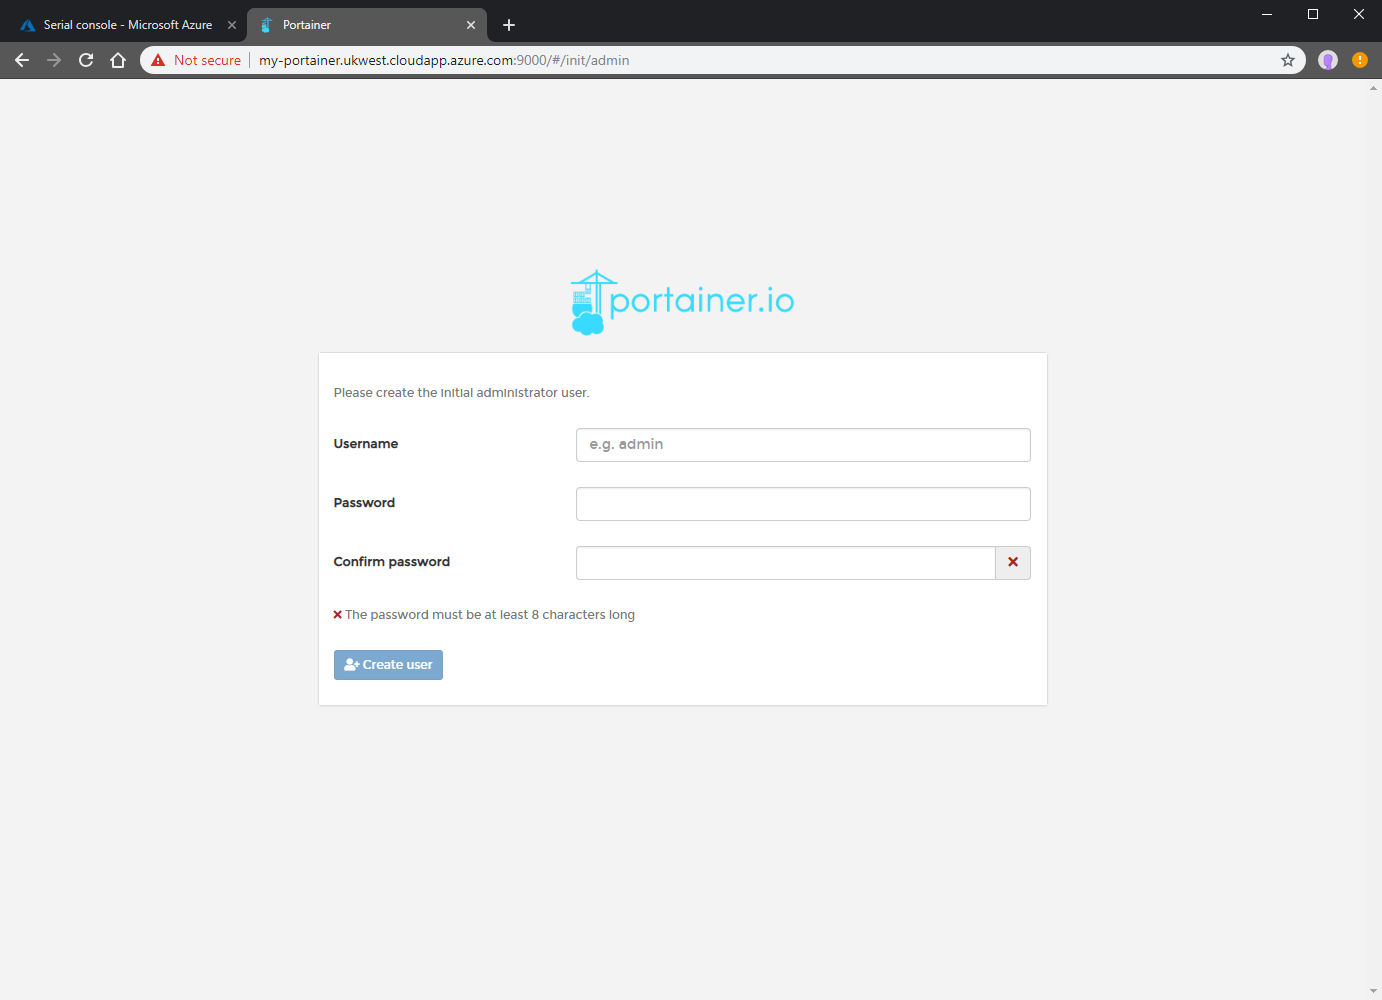
sudo docker run -d -p 9000:9000 -v /var/run/docker.sock:/var/run/docker.sock -v portainer_data:/data portainer/portainerOnce started, launch your browser and navigate to your Docker Host on port 9000. It will ask you to create a new user and password and ask what hosts you wish to manage. Once configured the home screen will contain a list of all Docker hosts managed by Portainer:
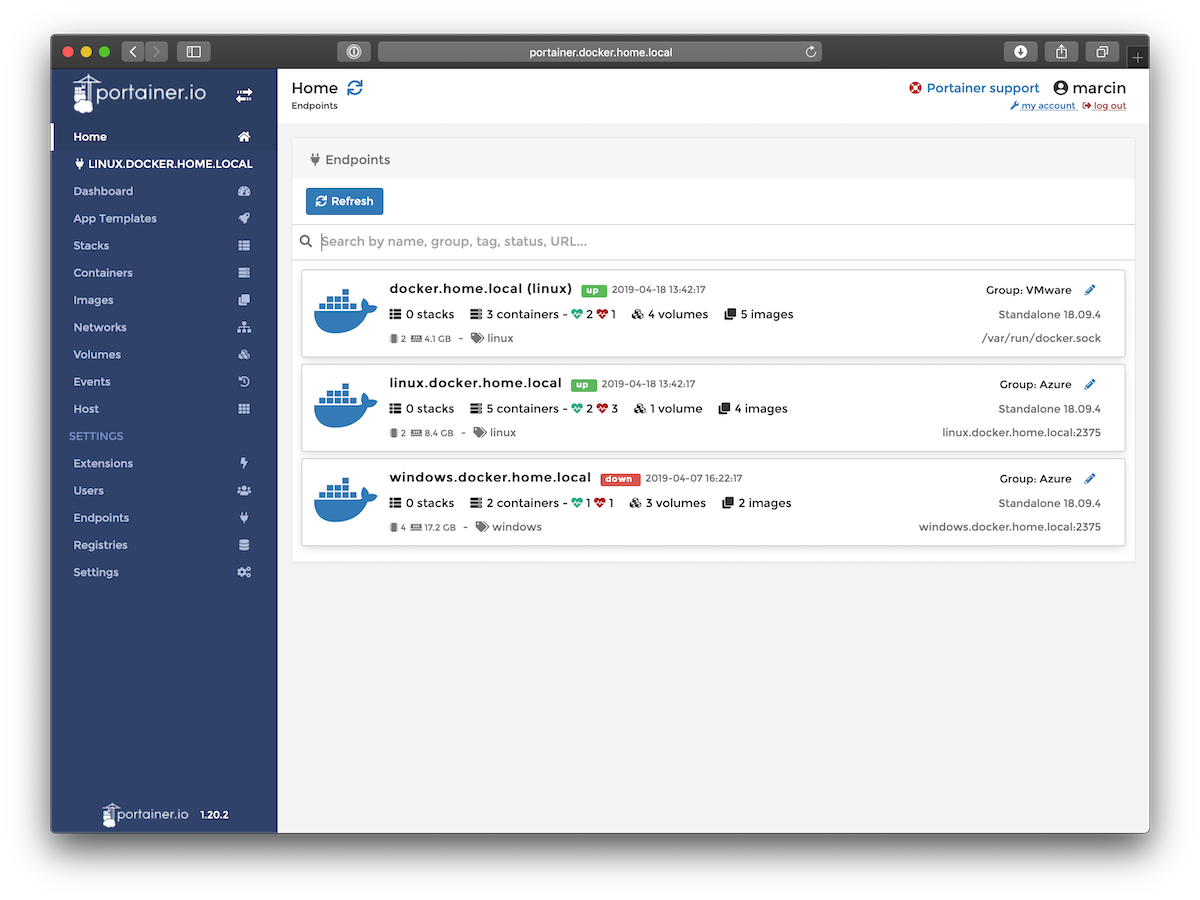
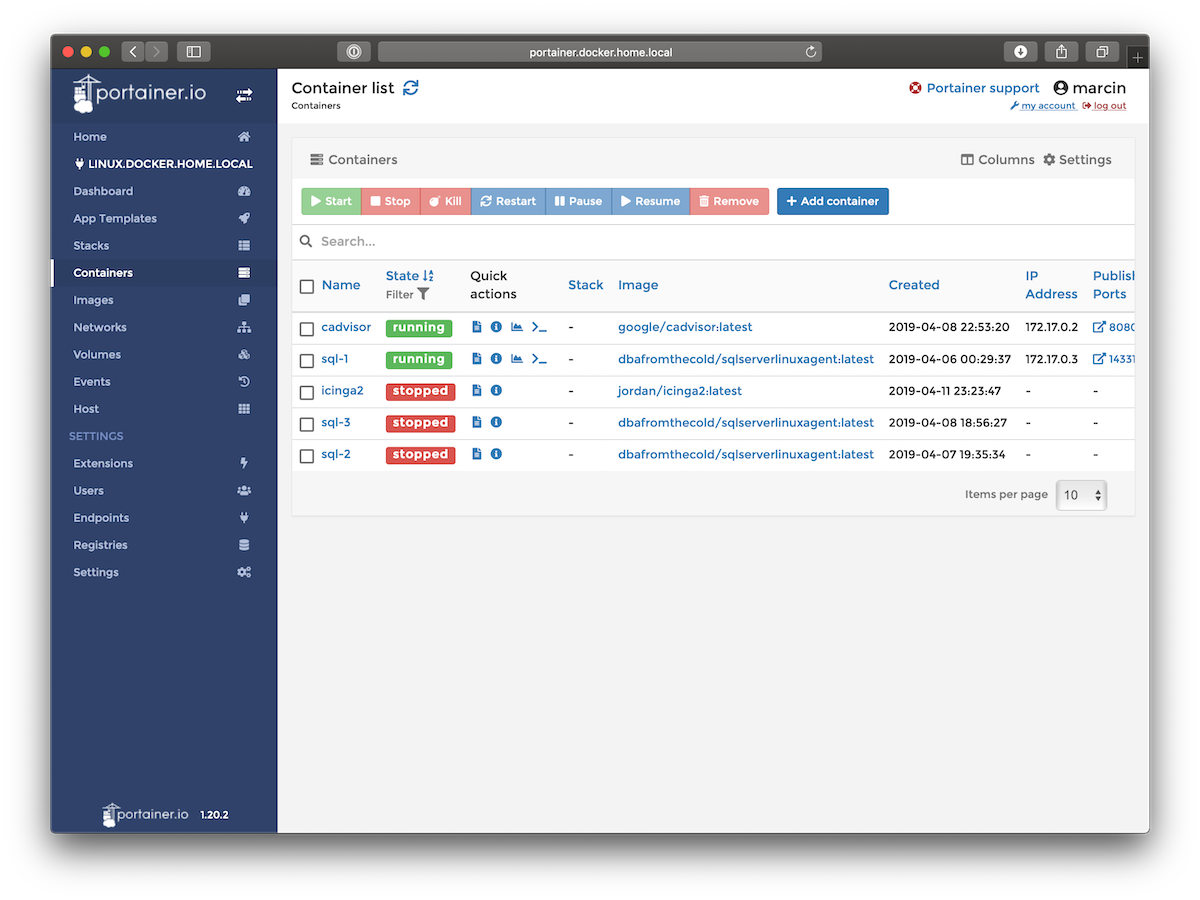
As you can see, I have three Docker hosts. Clicking on the host takes us to the list of Containers on that host:
Limitations
Although there are Windows-based containers, there are not as polished as Linux containers. Docker is mainly designed to run Linux. For that reason, you will have to use SQL Server on Linux Container, at least for now. I will cover Windows-based containers in the future post.
The official SQL Server Docker image does not contain the Agent service. I am using an image provided by Andrew Pruski (@dbafromthecold) which does contain the SQL Server Agent service. You can get it from the Docker Hub
Sadly, it does not support Active Directory authentication either.
Dedicated host
A freshly created SQL Server container takes about 1.5GB of RAM. If you have a computer with 8GB or more, you will be able to run multiple empty instances at the same time. As mentioned before, Docker Desktop is the easiest and fastest way to get started but not very scalable and flexible.
I will guide you how to set up Azure VM running Ubuntu 18.04 and Docker. I am also aware of the Azure Kubernetes service, but it works out quite expensive in comparison to the virtual machine. In addition, I can start and stop VM when necessary which brings down the total cost of runnable time.
If you had a spare physical server, you could install Ubuntu on the bare metal without the additional layer of virtualisation.
Create Azure VM
First, let’s create an Azure VM with Ubuntu 18.04. If you do not already have Azure account you can get one for free here: https://azure.microsoft.com/free/.
Once you have an account, go to the portal https://portal.azure.com and create a new resource.

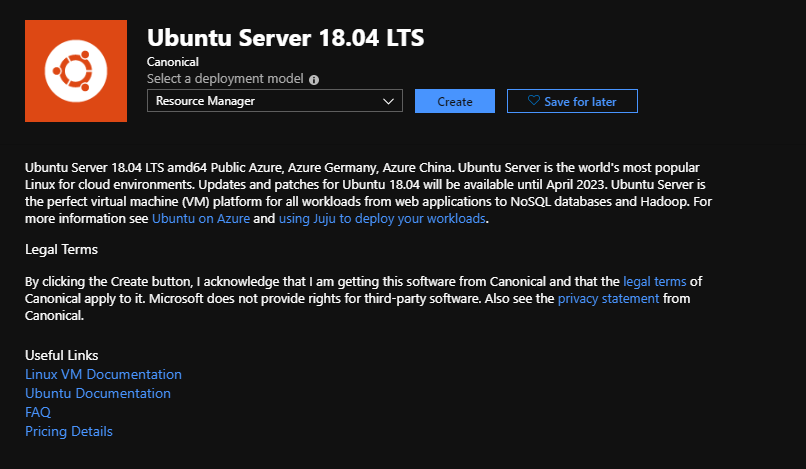
Search for Ubuntu Server 18.04 LTS and create using Resource Manager:
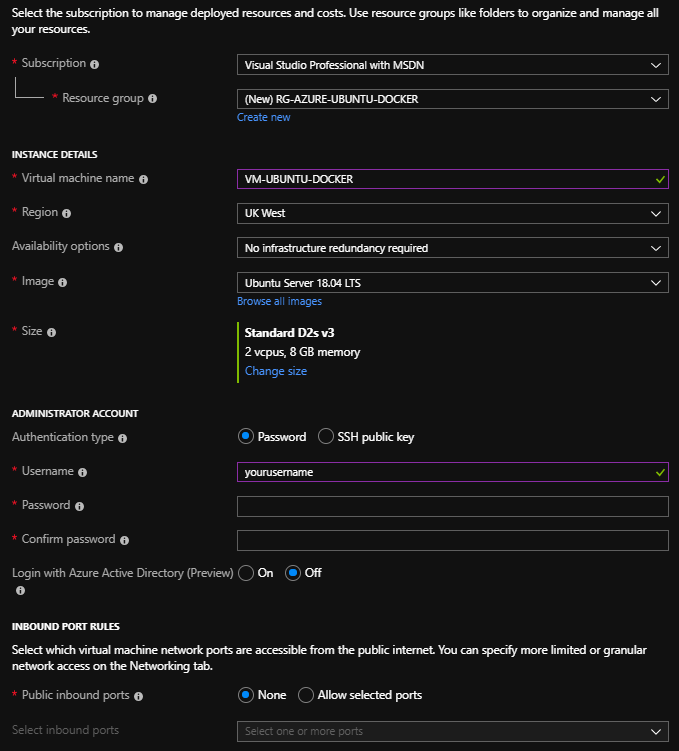
On the next screen, we can give the new VM a name, selected required size (RAM and CPU), specify username and password for the VM:
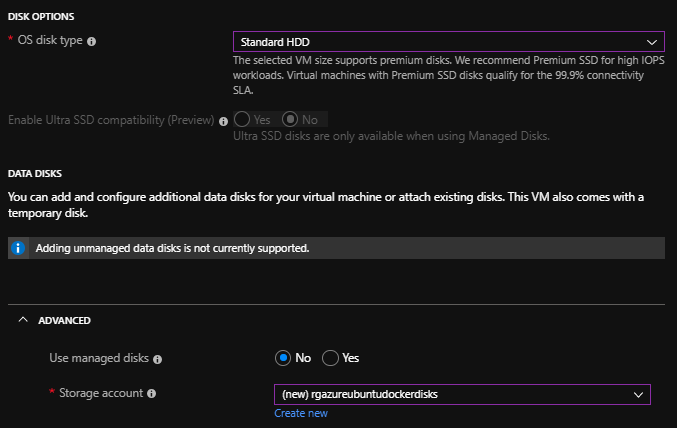
On the next screen, we will select disks. I use Standard, non-managed HDD. They are really cheap and usually offer enough performance for my needs. Standard HDD must have a Storage account. The wizard will create one for us:
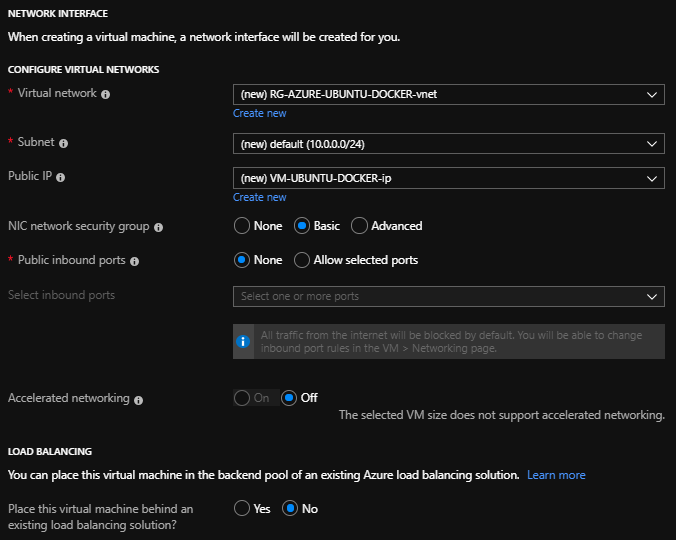
Next screen provides network configuration, we can leave it all as default:
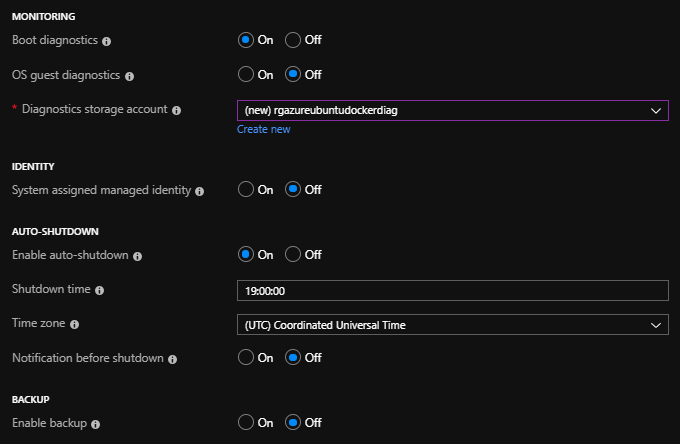
Next, Management, here we can set different options, such as setting the VM to automatically shut down at a given time to cut the cost down:
We can skip advanced settings and go straight to the last Review + Create step.
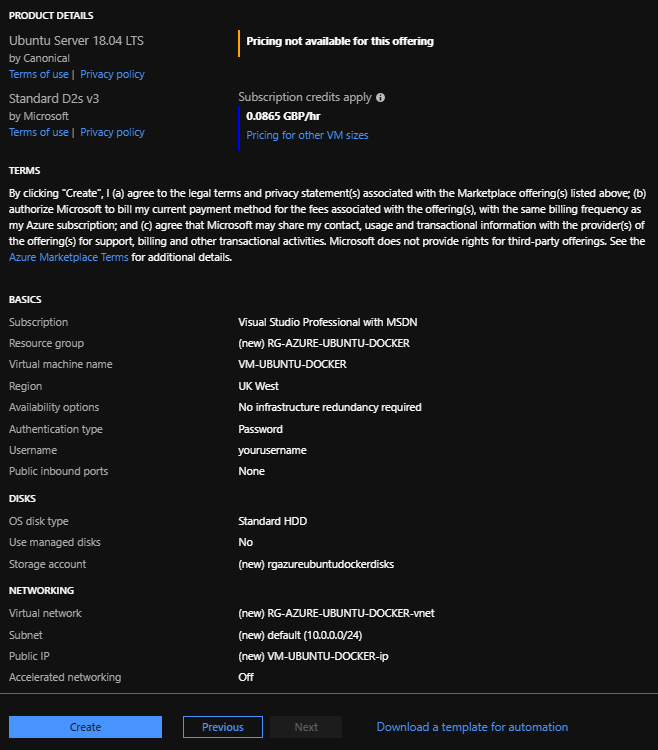
Finally, click Create to create the VM.
Install Docker
Navigate to the newly created virtual machine, open up the Serial console and login with the user name and password specified in the steps above.

This will launch a console session which we will use to install Docker:
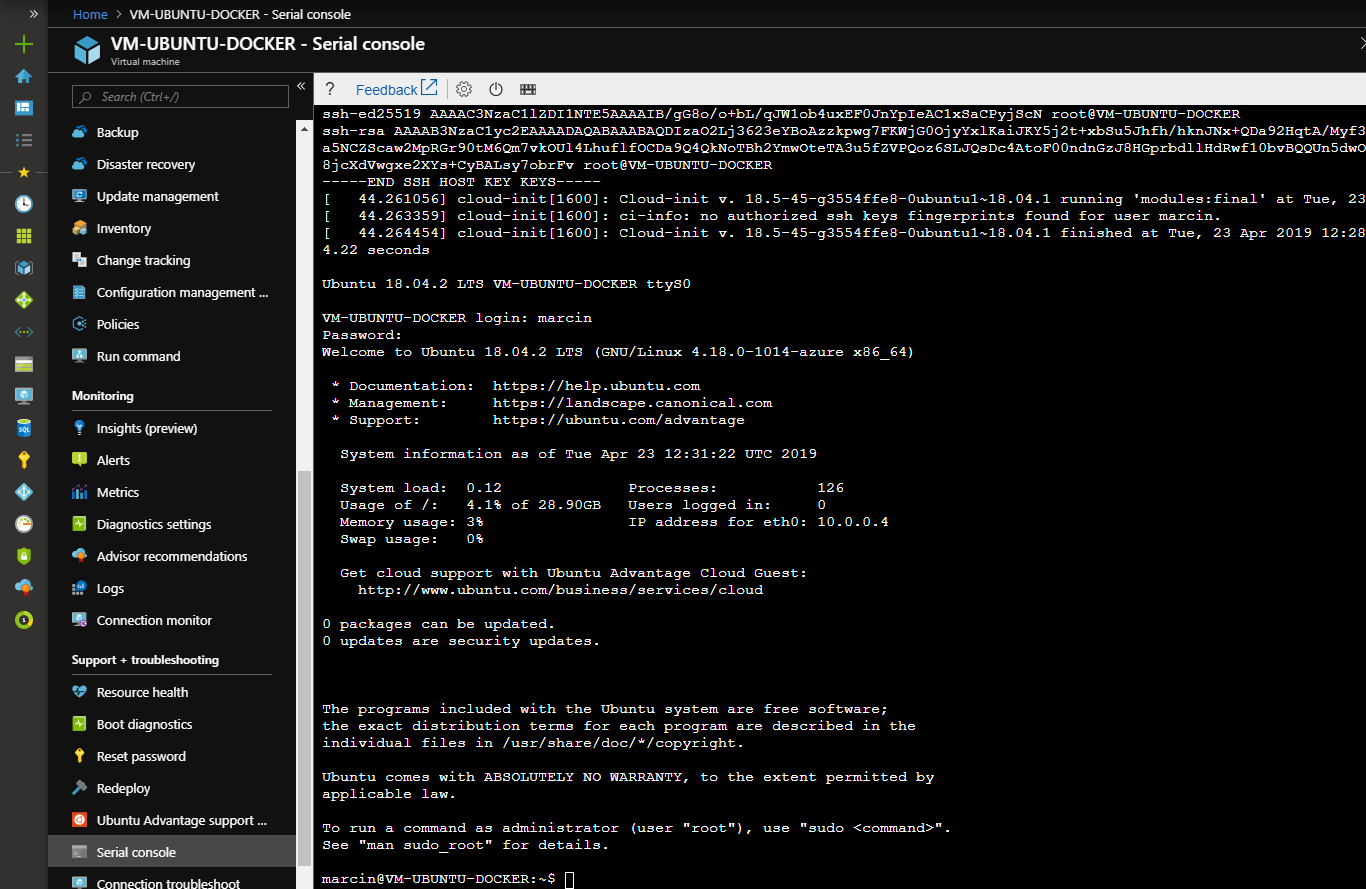
For security reasons, we have not enabled inbound ports on the firewall, and it is not yet possible to connect to the VM from the internet. We have to use the Azure Portal console for now. I will cover network configuration later.
Install from the Ubuntu repository
We can install Docker from either the standard Ubuntu repository or the official Docker repository. Using Ubuntu repository could result in installing an older version of the Docker engine but it’s a much simpler process:
sudo apt install docker.io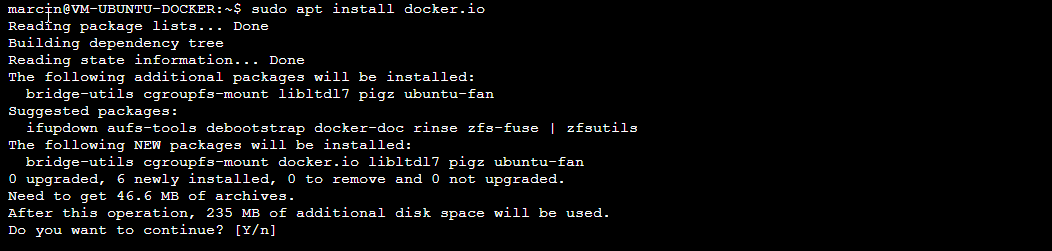
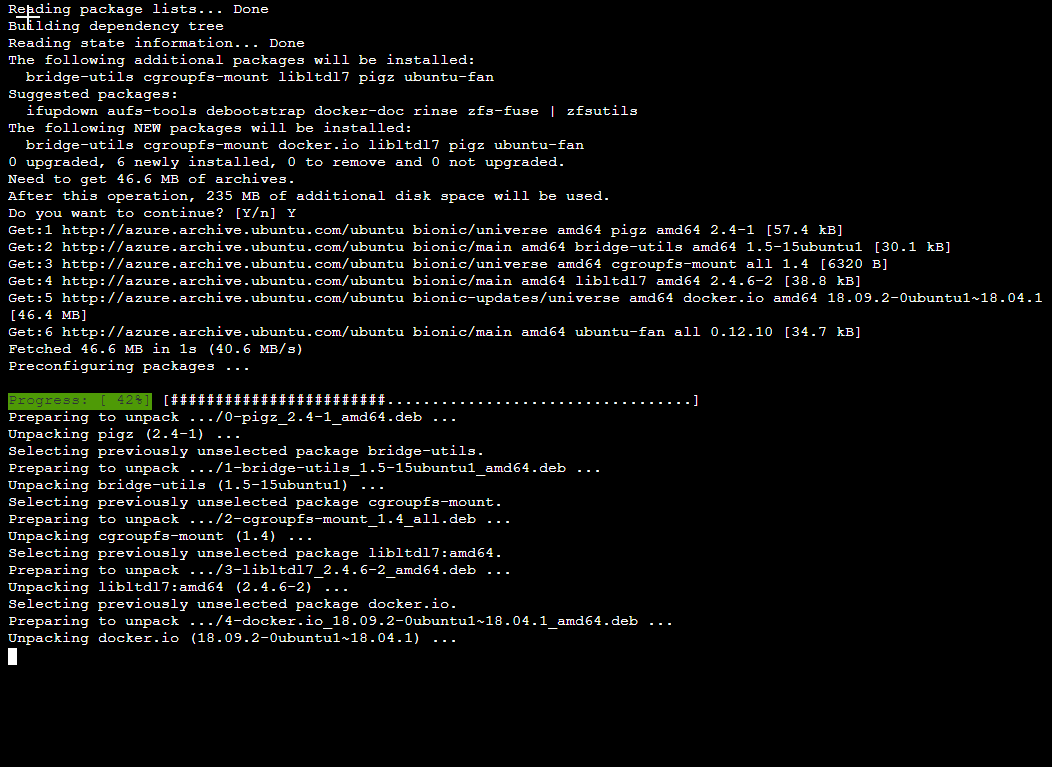
Press Y to accept. This will run the installer:
Start Docker:
sudo systemctl start dockerRun Docker at start-up
sudo systemctl enable dockerCheck which version of Docker you have installed:
docker --version
Install from the official Docker repository
Docker provides a step by step guide for installing Docker CE (the free, Community Edition) on Ubuntu: https://docs.docker.com/v17.09/engine/installation/linux/docker-ce/ubuntu/. I followed it without any issues. In essence, the installation process consists of two parts:
- Configure repository for the Ubuntu’s package installer
apt-get - Install Docker package from the configured repository
Install Portainer
We can now install Portainer following the guide on top of this post. It will download the latest version automatically:

Configure Azure firewall
Now we have a VM with the Docker and Portainer installed. We can look at granting access to the web interface. The best way would be to run a VPN tunnel between your home/office and the Azure network, but this would need its own, separate post to go through in details. I will focus on a basic setup, without a VPN, in which case you will be accessing your Docker Host over the internet.
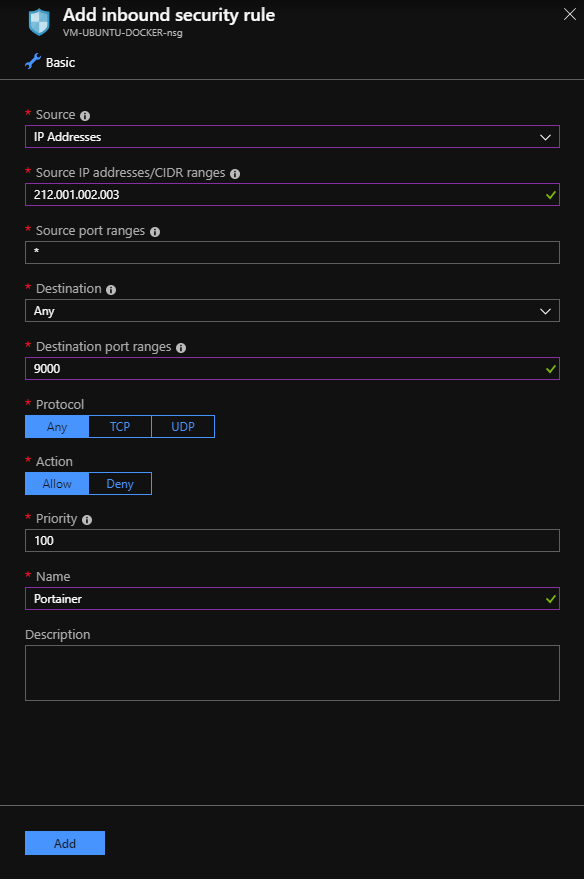
Navigate to Networking blade and Add inbound rule.
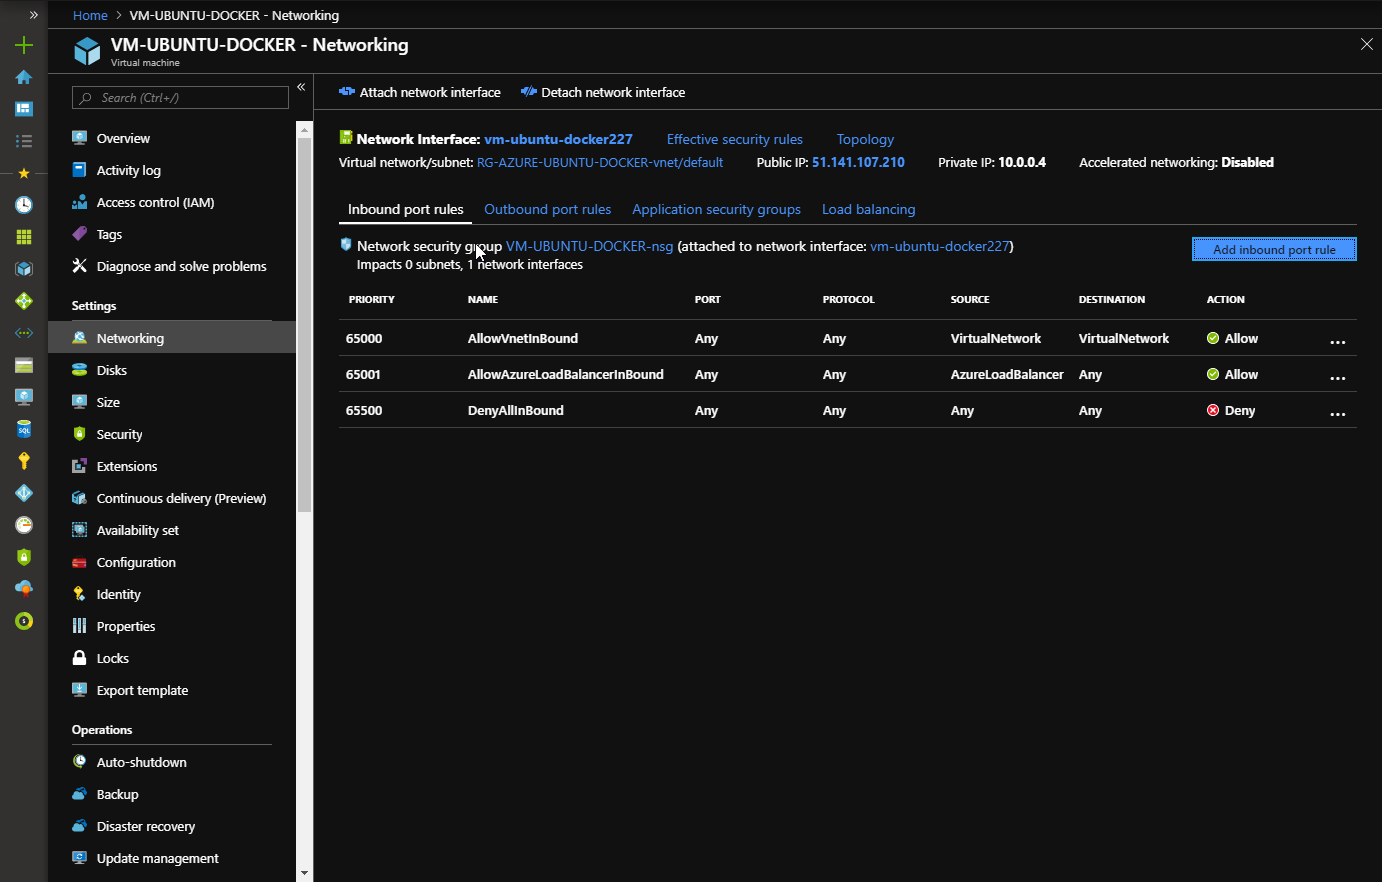
In the Source IP type in your IP address. You can find your own IP here: https://www.myip.com/
You should now be able to reach the Portainer interface on the Public IP specified in the Networking blade. In my example, this is 51.141.107.210. To make it easier, we can create a DNS record which we can use to connect to the Azure VM, instead of having to remember its IP address.
Whilst in the Networking blade, click on the Public IP, in my example 51.141.107.210, go to Configuration and change the DNS name label. I have used “my-portainer”

You should now be able to navigate to the DNS record (remember about the port 9000), in my case: https://my-portainer.ukwest.cloudapp.azure.com:9000
You can now further configure firewall and add ports you will use for SQL instances. A range of ports between 14331 and 14339 would be 14331-14339.
Conclusion
Docker is not the only containerisation technology but probably the most popular one and with official SQL Server images. It is definitely worth exploring, especially if you need a fast to spin-up, ad-hoc test environments.
One particular test requirement for SQLWATCH was to make it runs with a different collation. This was easily achieved by running a number of containers from the same image but with different collation, also each on a different port.
docker run -e ACCEPT_EULA=Y -e SA_PASSWORD='yourStrong(!)Password' -e MSSQL_COLLATION=MSSQL_COLLATION:=Latin1_General_CI_AS -p 14332:1433 --name sql-2 -d microsoft/mssql-server-linux:2017-latestThis will start another container, a new instance of SQL Server from the downloaded image. The new name will be sql-1 and will have a different collation. The entire process takes a few seconds. It should go without saying that the Azure configuration presented in this post is very basic and for demonstration purposes.
This post was originally published on June 3, 2020.